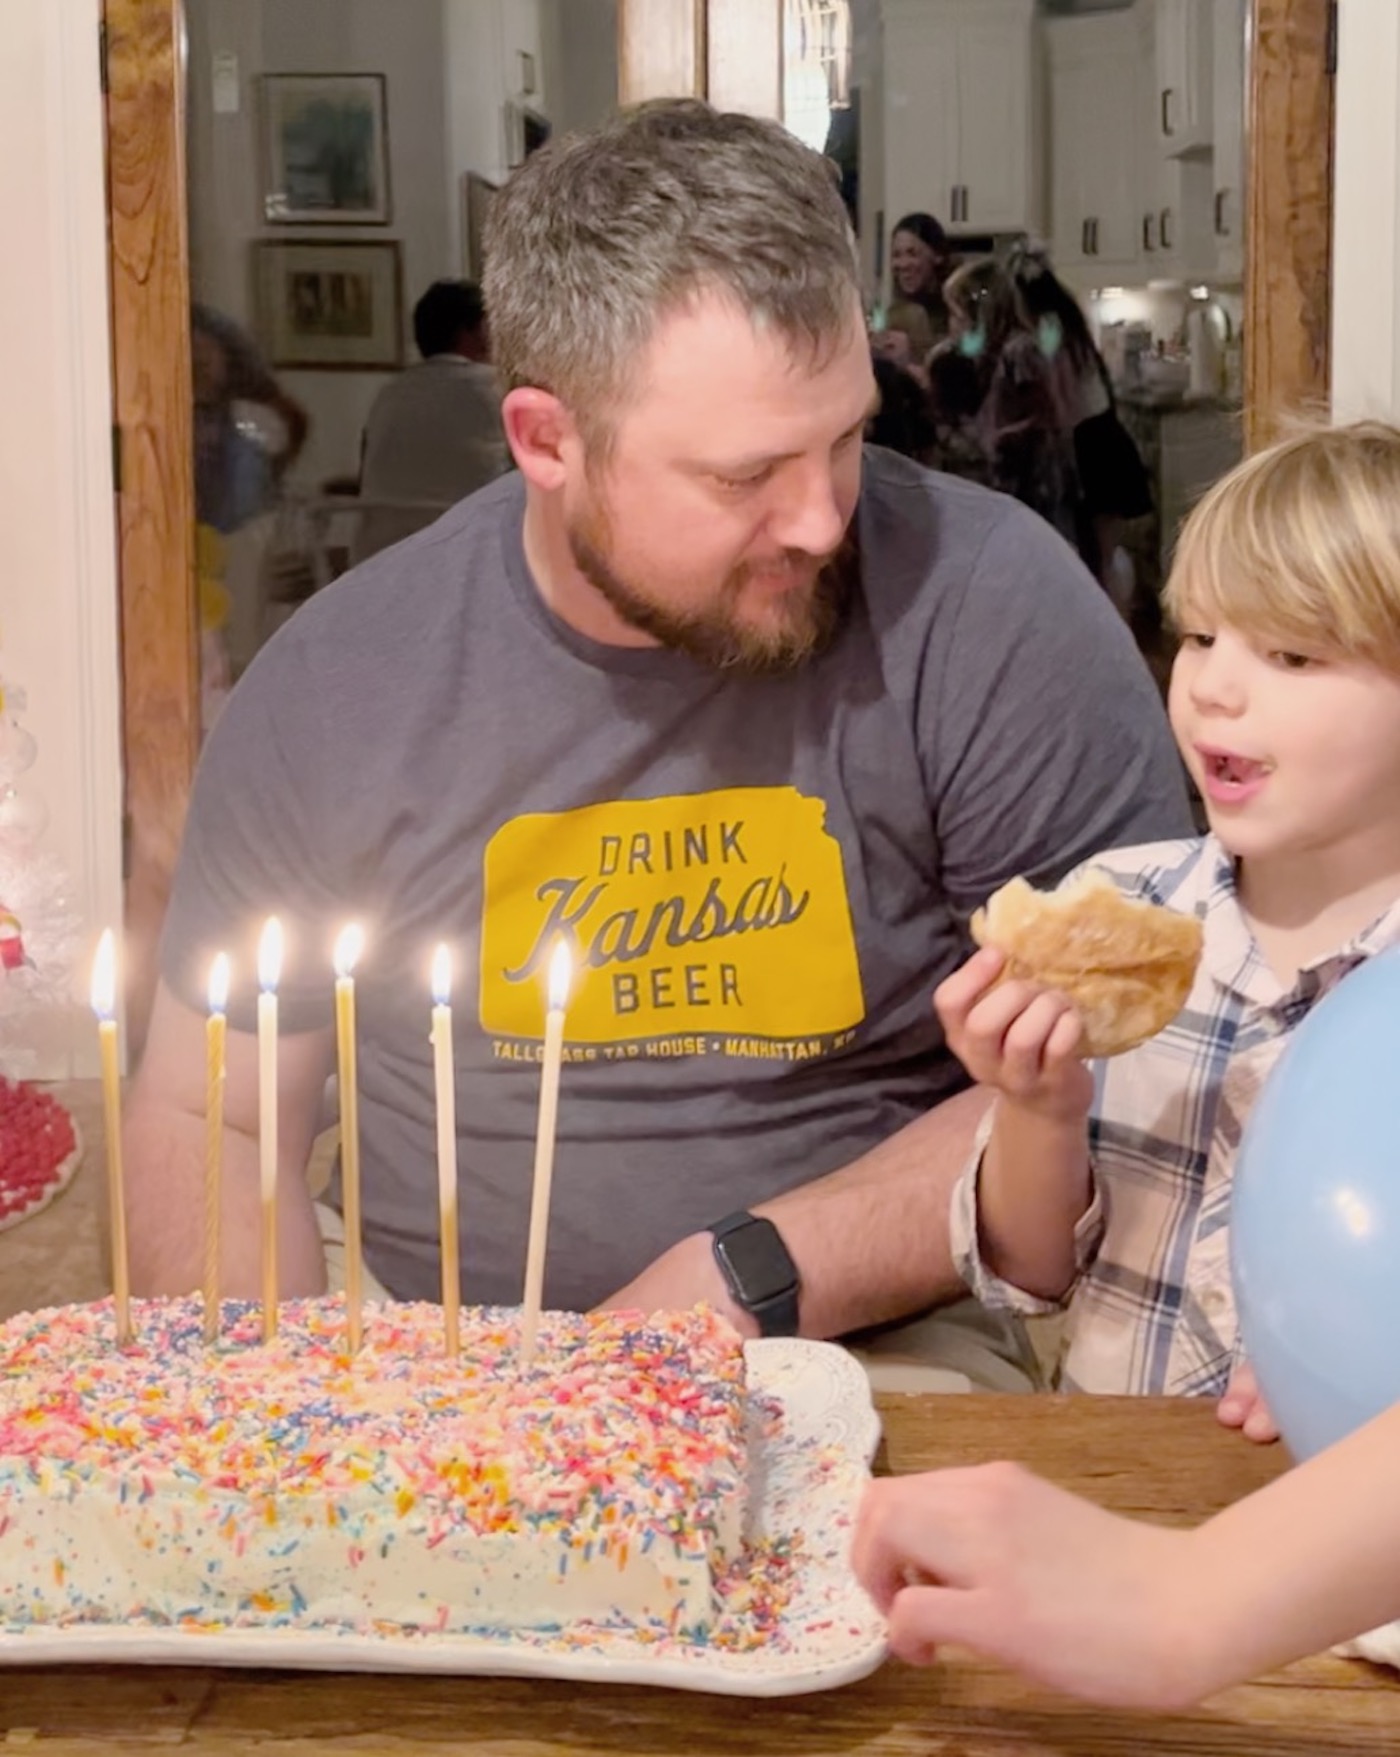
Price had a birthday earlier this week, so to celebrate, the kids and I made him an ice cream cake using his two favorite ice creams– Chocolate Chip Cookie Dough and Cookies and Cream! It was a day-long project (on and off because of the freezing periods required) but OH SO WORTH IT!! We all thoroughly enjoyed the end result!
There is a video on Instagram with visuals of more of the steps, so for this post, I’ll more TELL you what we did, and I’ll let the Instagram video SHOW you! 🙂
WHAT YOU NEED:
9 x 9 baking or casserole container
a quart of ice cream of your choice # 1
a quart of ice cream of your choice # 2
12 oreos
1/2 cup peanut MnMs
1/2 stick butter
4 cups heavy cream (divided)
1 cup chocolate chips
1/2 tsp vanilla extract
3 Tablespoon corn syrup
1/3 cup powdered sugar
Sprinkles!!
HERE’S HOW WE MADE IT!
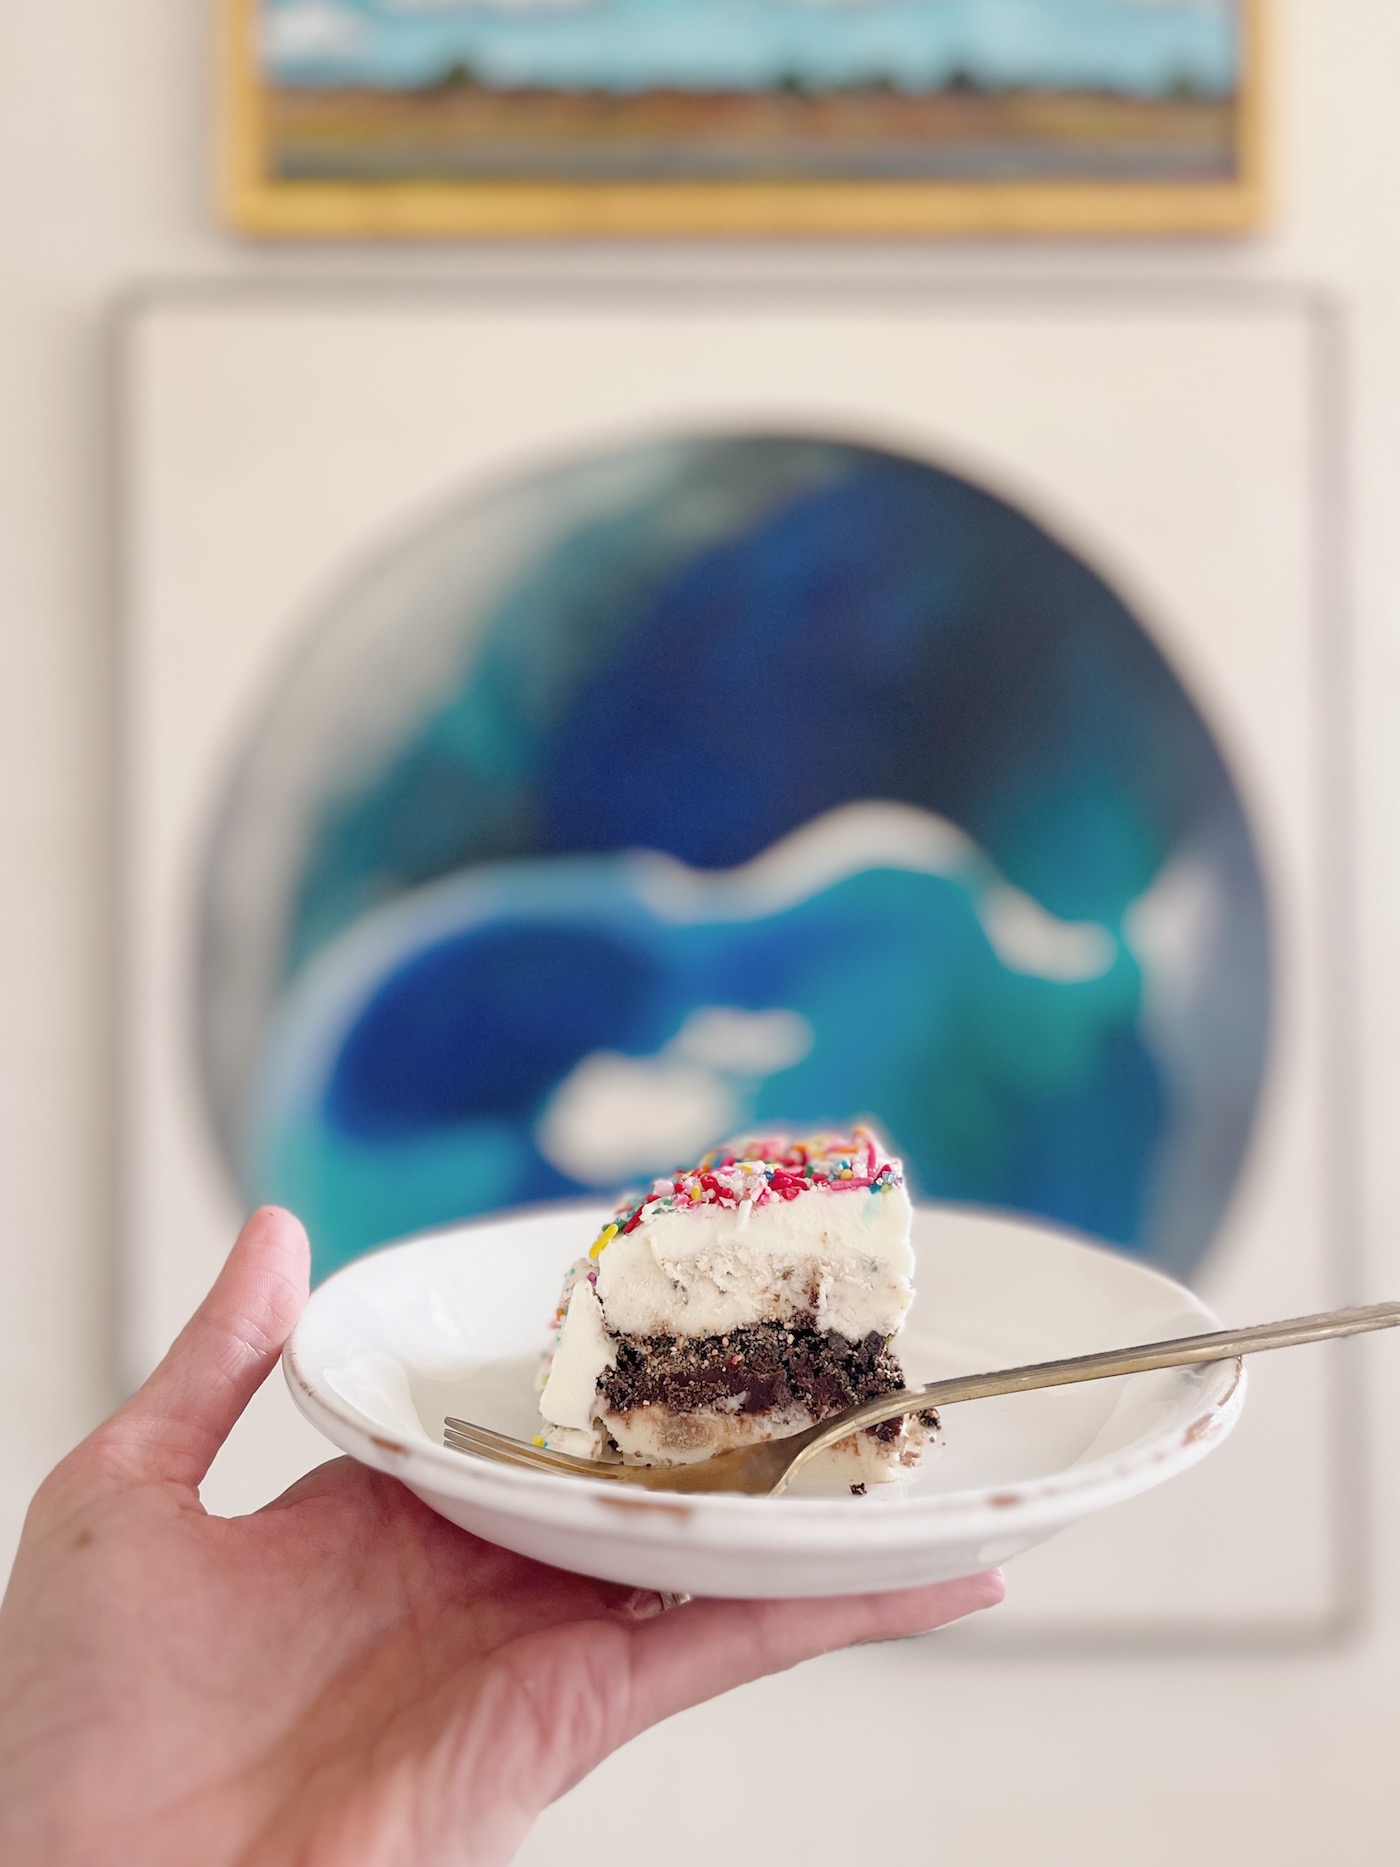
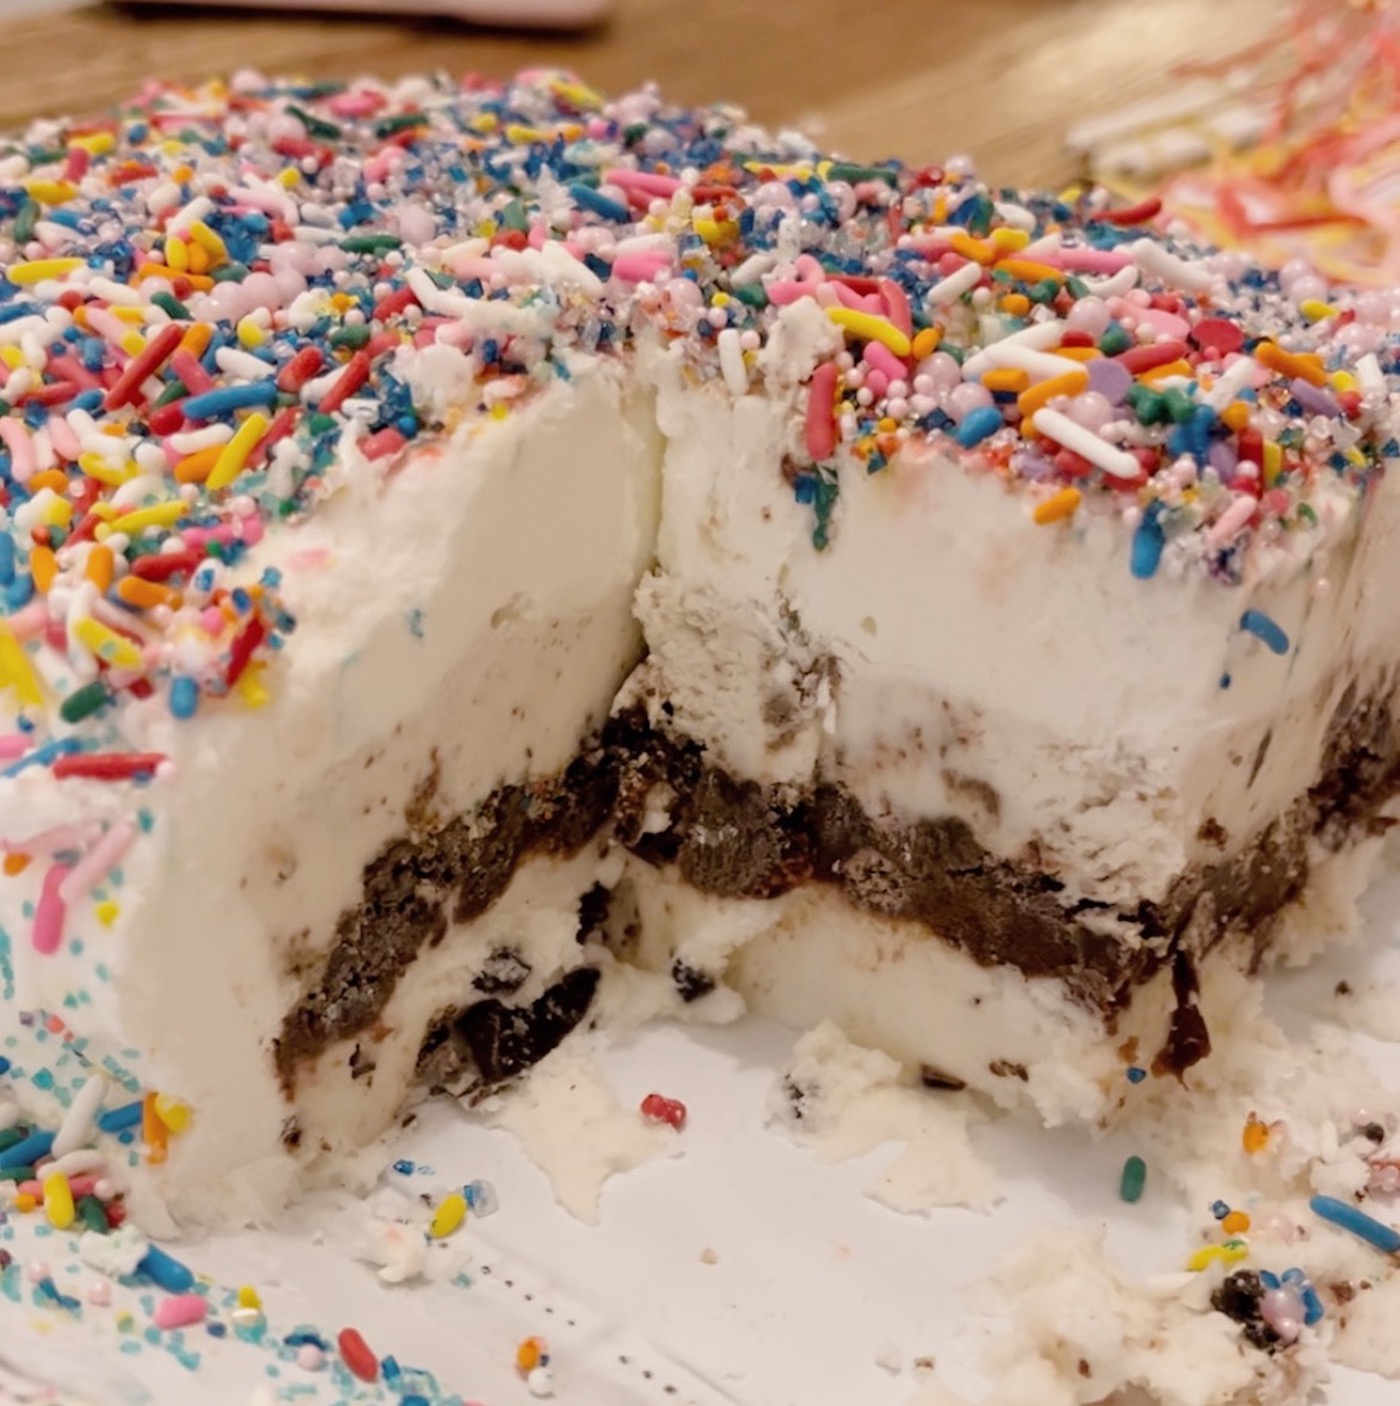
- Set one of the ice creams out about 30 minutes before you get ready to start. Once it’s had time to melt a bit and is soft and easy to scoop and spread, spread about an one inch deep layer of ice cream into the bottom of the square dish. Freeze until firm.
- While that is in the freezer, you’ll prepare your chocolate layers, which in my opinion, MAKE this cake.
- First, use a food processor or high quality blender and pulverize your 1/2 cup of peanut MnMs. (This was Dempsey’s idea and it was a GREAT idea!) Set these aside for now
- Next, preheat your oven to 350. Crush your 12 Oreos (I did this with a roller in a ziplock bag) then toss them until well coated with your 1/2 stick of butter, melted.
- Line a cookie sheet with parchment paper and spread out your Oreo mixture. Bake this for 6 or 7 minutes. The white part of the Oreo will melt in the oven, so when you pull this out of the oven, it will look like a mess, but #TrustTheProcess
- Once the Oreos have cooled off, carefully pick up the parchment paper to where you can re-crumble them into small pieces again. These will serve as the chocolate crunchies similar to what Dairy Queen uses in her amazing ice cream cakes! (The purpose of the butter and the baking is to keep the Oreos from getting soggy. This way, they stay crunchy!) Also set these aside for now.
- Now to make the chocolate ganache layer! Take your cup of chocolate chips and put them in a heat-safe bowl. Add the 3 Tbl of corn syrup and the 1/2 tsp of vanilla extract. Then bring 1/2 cup of your heavy cream to a boil, pour it over the chocolate chips, corn syrup, and vanilla and let sit for two minutes. Then stir until smooth!
- Take your dish out of the freezer (once your first ice cream layer has firmed up) and pour the chocolate ganache over the ice cream and spread evenly. Then top with the Oreo crumbles and the pulverized MnMs. Then stick this back in the freezer. This might take about 2 hours to firm up enough for the next step! So go run errands!
- When you get back, you’ll want to let your second ice cream flavor sit out to thaw a bit. Once it’s soft, and the layers you have so far are frozen, put another inch thick layer of it on top of the chocolate layers. Then freeze again.
- While this is freezing, take the other 3.5 cups of heavy whipping cream and, using a mixer, make whipped cream. This will be your “icing!” Once it starts getting thicker, add your 1/3 cup powdered sugar and keep mixing until it is whipped cream consistency. This might take 10-15 minutes. Set in the fridge.
- Once our cake was frozen, we took it out of the baking dish and transferred it onto a platter so I could access all sides for icing purposes. You could leave yours in the dish and just ice the top, but if you want to take it out, I found a warm spatula to be a very handy tool!
- I iced all sides, froze it, then took it out and iced it again.
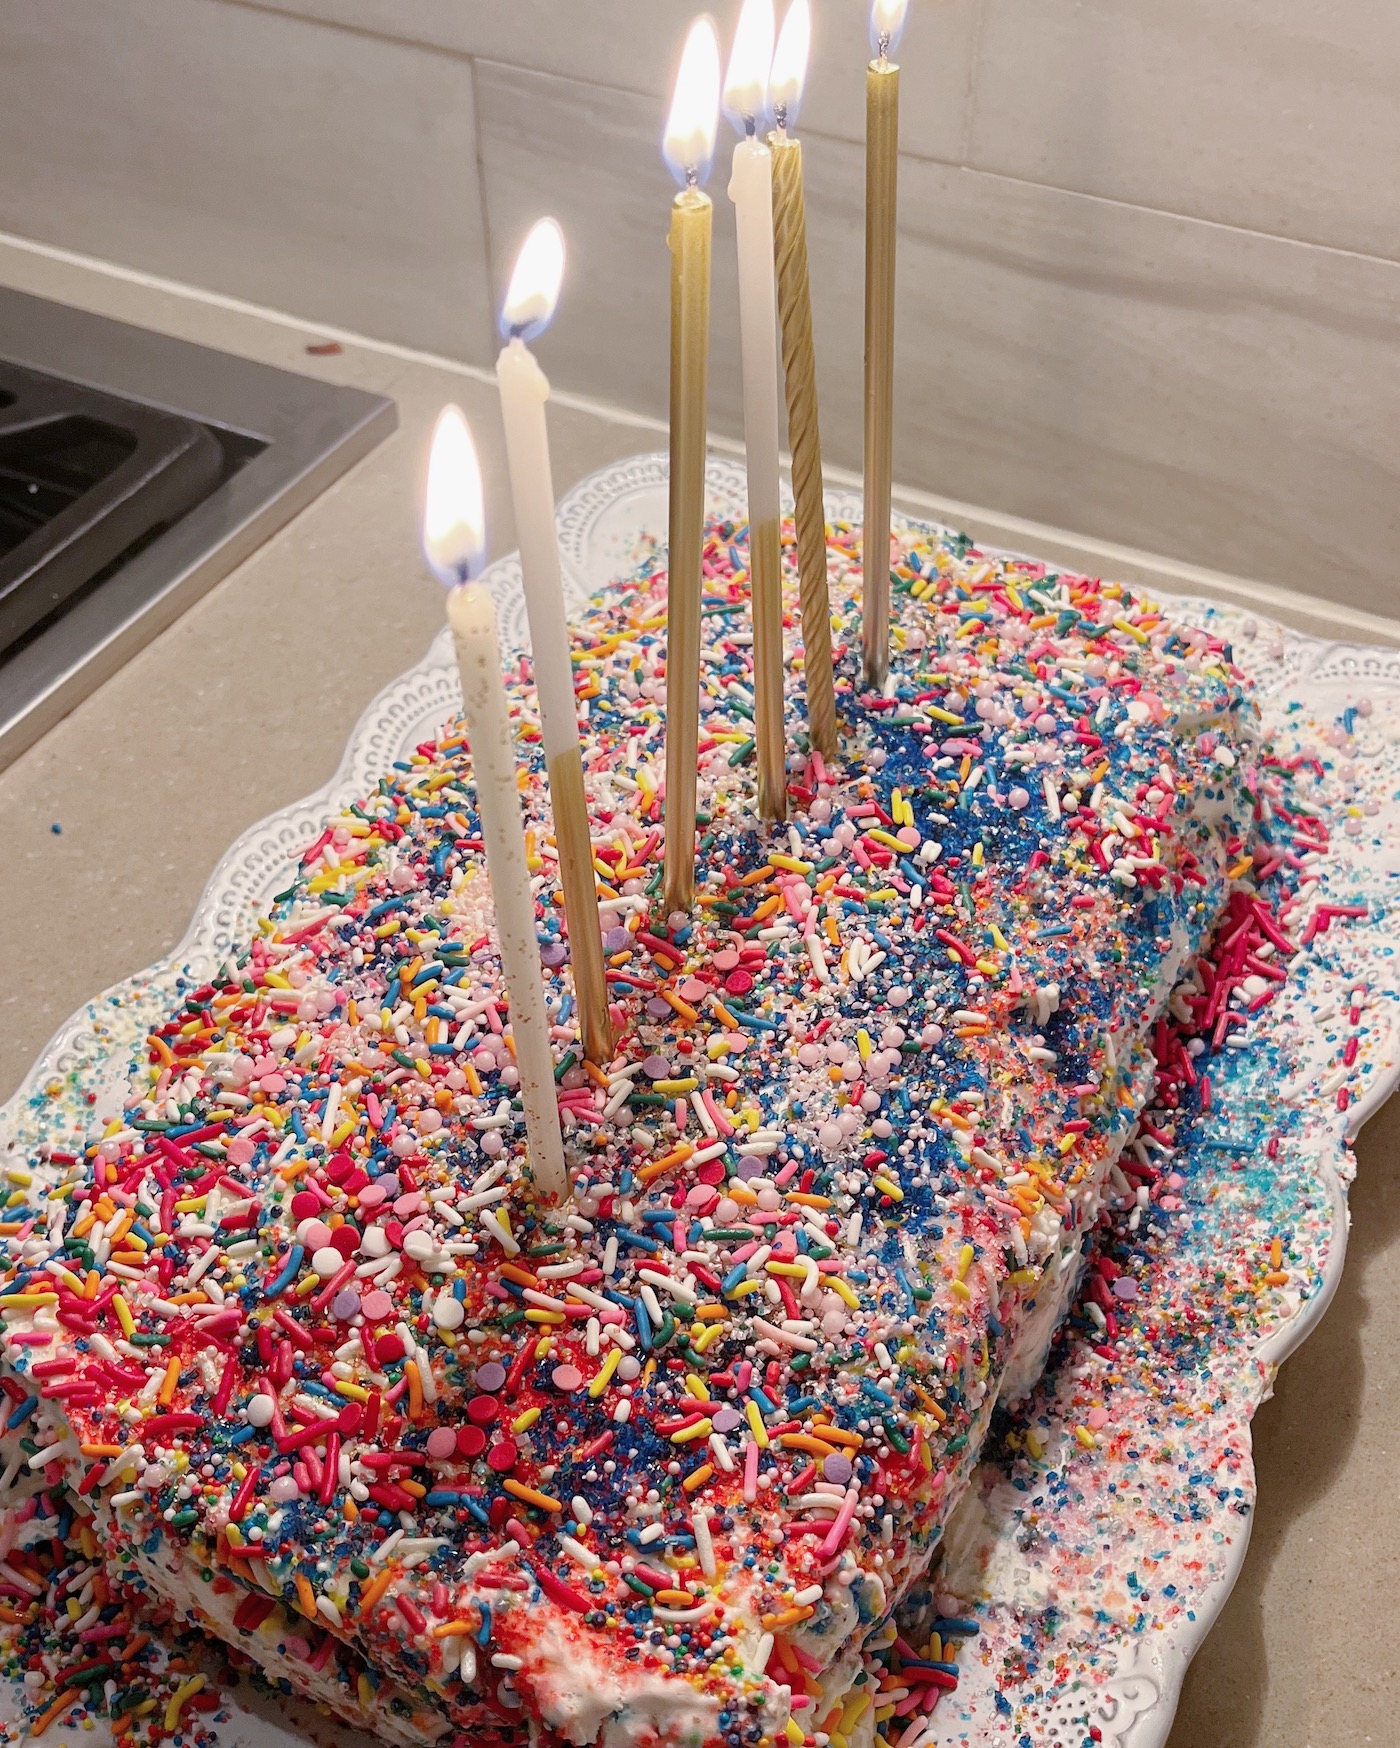
- After the second icing, I let the kids put as many sprinkles as they possibly could onto the cake!
- I may have let them get a little out of control, and there was a comment or two that we had “too many sprinkles.” But they didn’t bother me one single bit!! 🙂
- Once it was iced and sprinkled, we just kept it in the freezer until time to sing Happy Birthday and consume the goods!
I hope you ENJOY this if you make it!! Again, there is a little bit of a time investment as far as all the steps with the freezing between each layer. So plan for that before you dive in. But I really think you’ll enjoy what you end up with! Even if it’s not all that pretty, IT WILL TASTE GOOD!
Thank you so much for being here! And HAPPY BIRTHDAY PRICE! Thanks for giving us an excuse to make this yumminess! 🙂 WE LOVE YOU!!!
(( Here’s the link to the Instagram video again! ))
XOXO!