
If you follow me on Instagram, you may have noticed that I’m really into charcuterie/cheese/food boards, trays, and tables lately. It’s become one of my favorite art forms recently. I think it’s because the process of arranging is relaxing to me, it makes for pretty pictures, then of course the best part is EATING IT!
I get tons of questions about these boards, so I wanted to share everything I could with you!
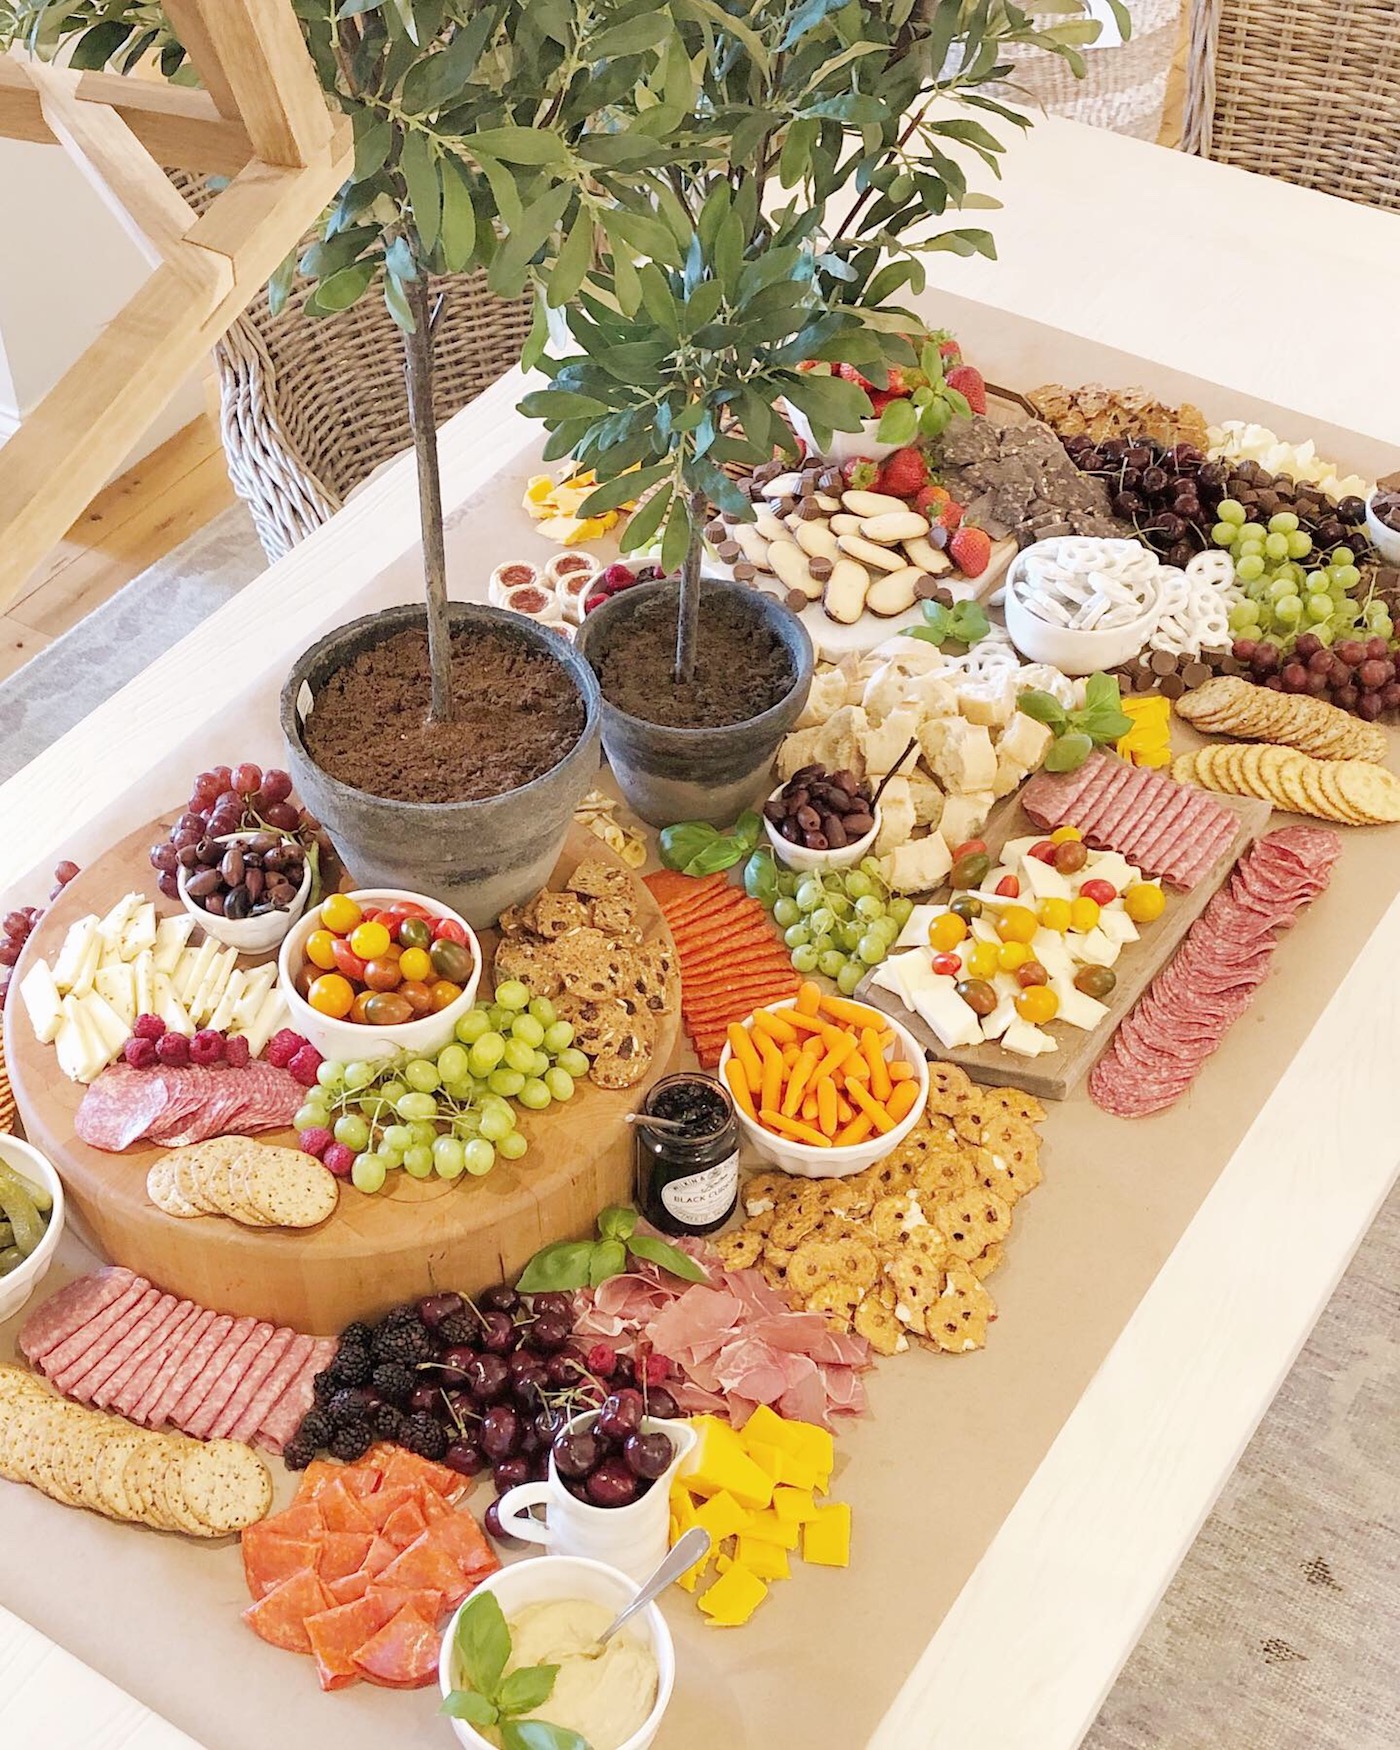
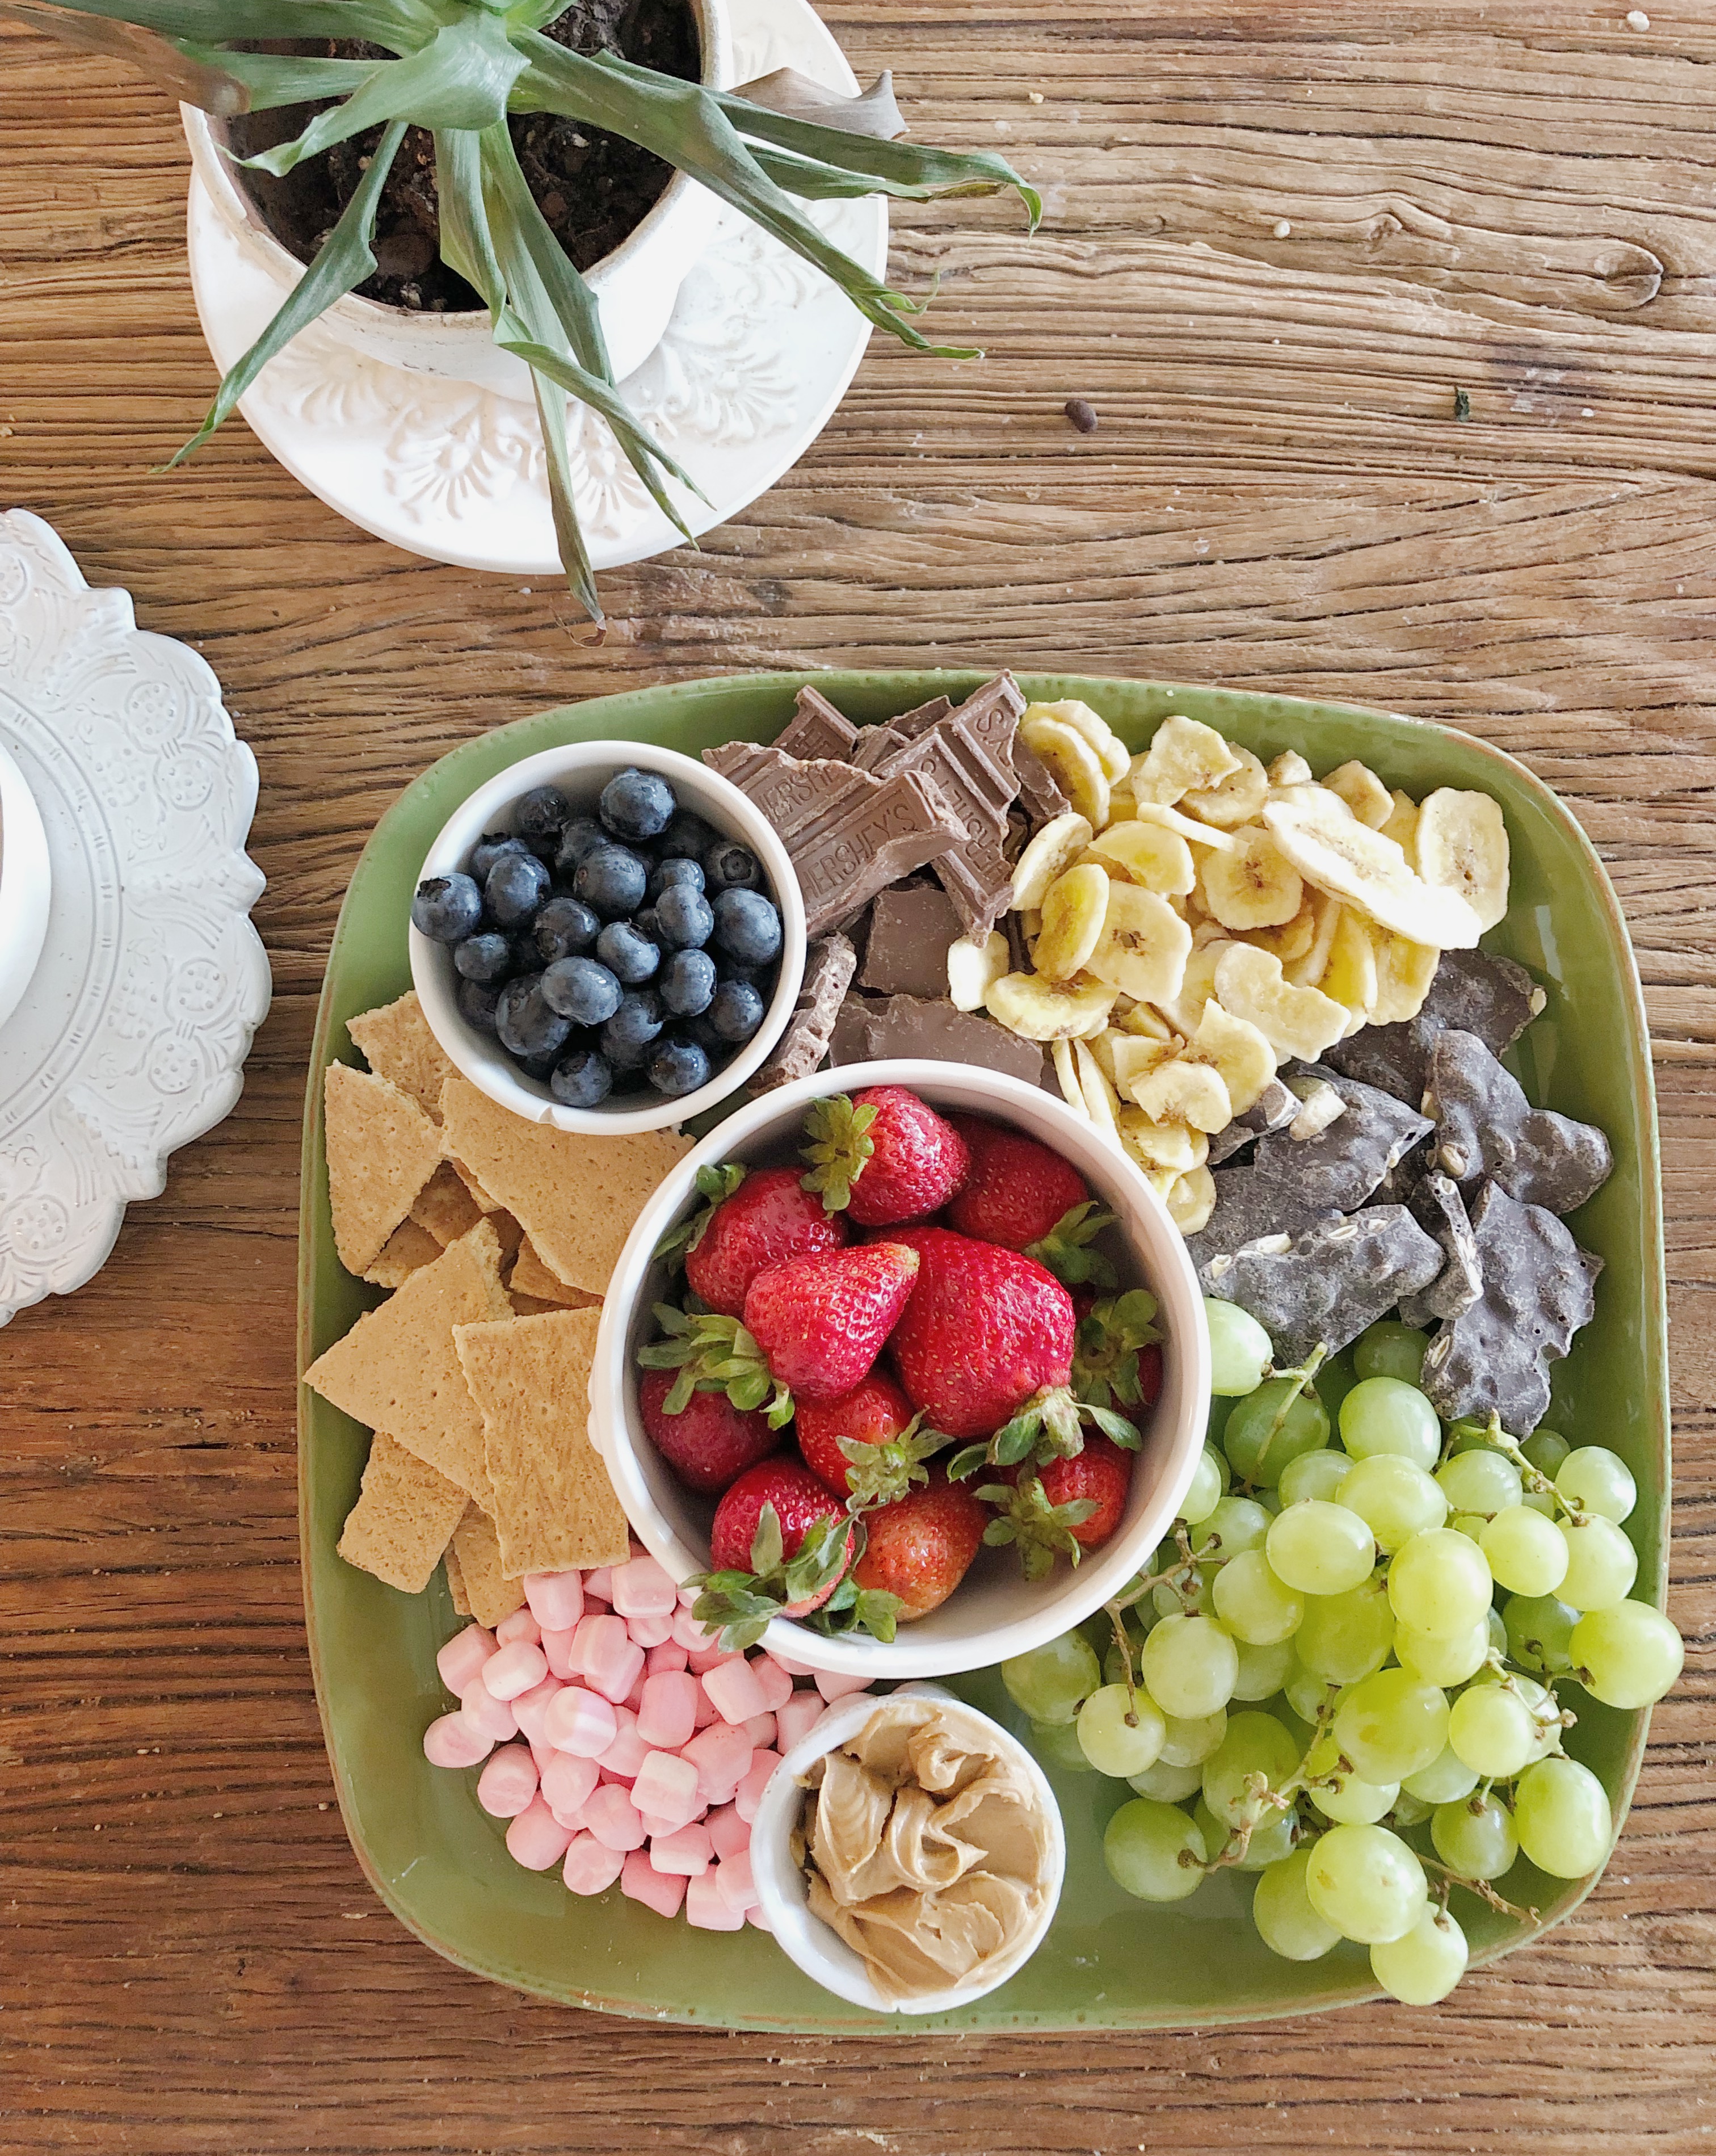
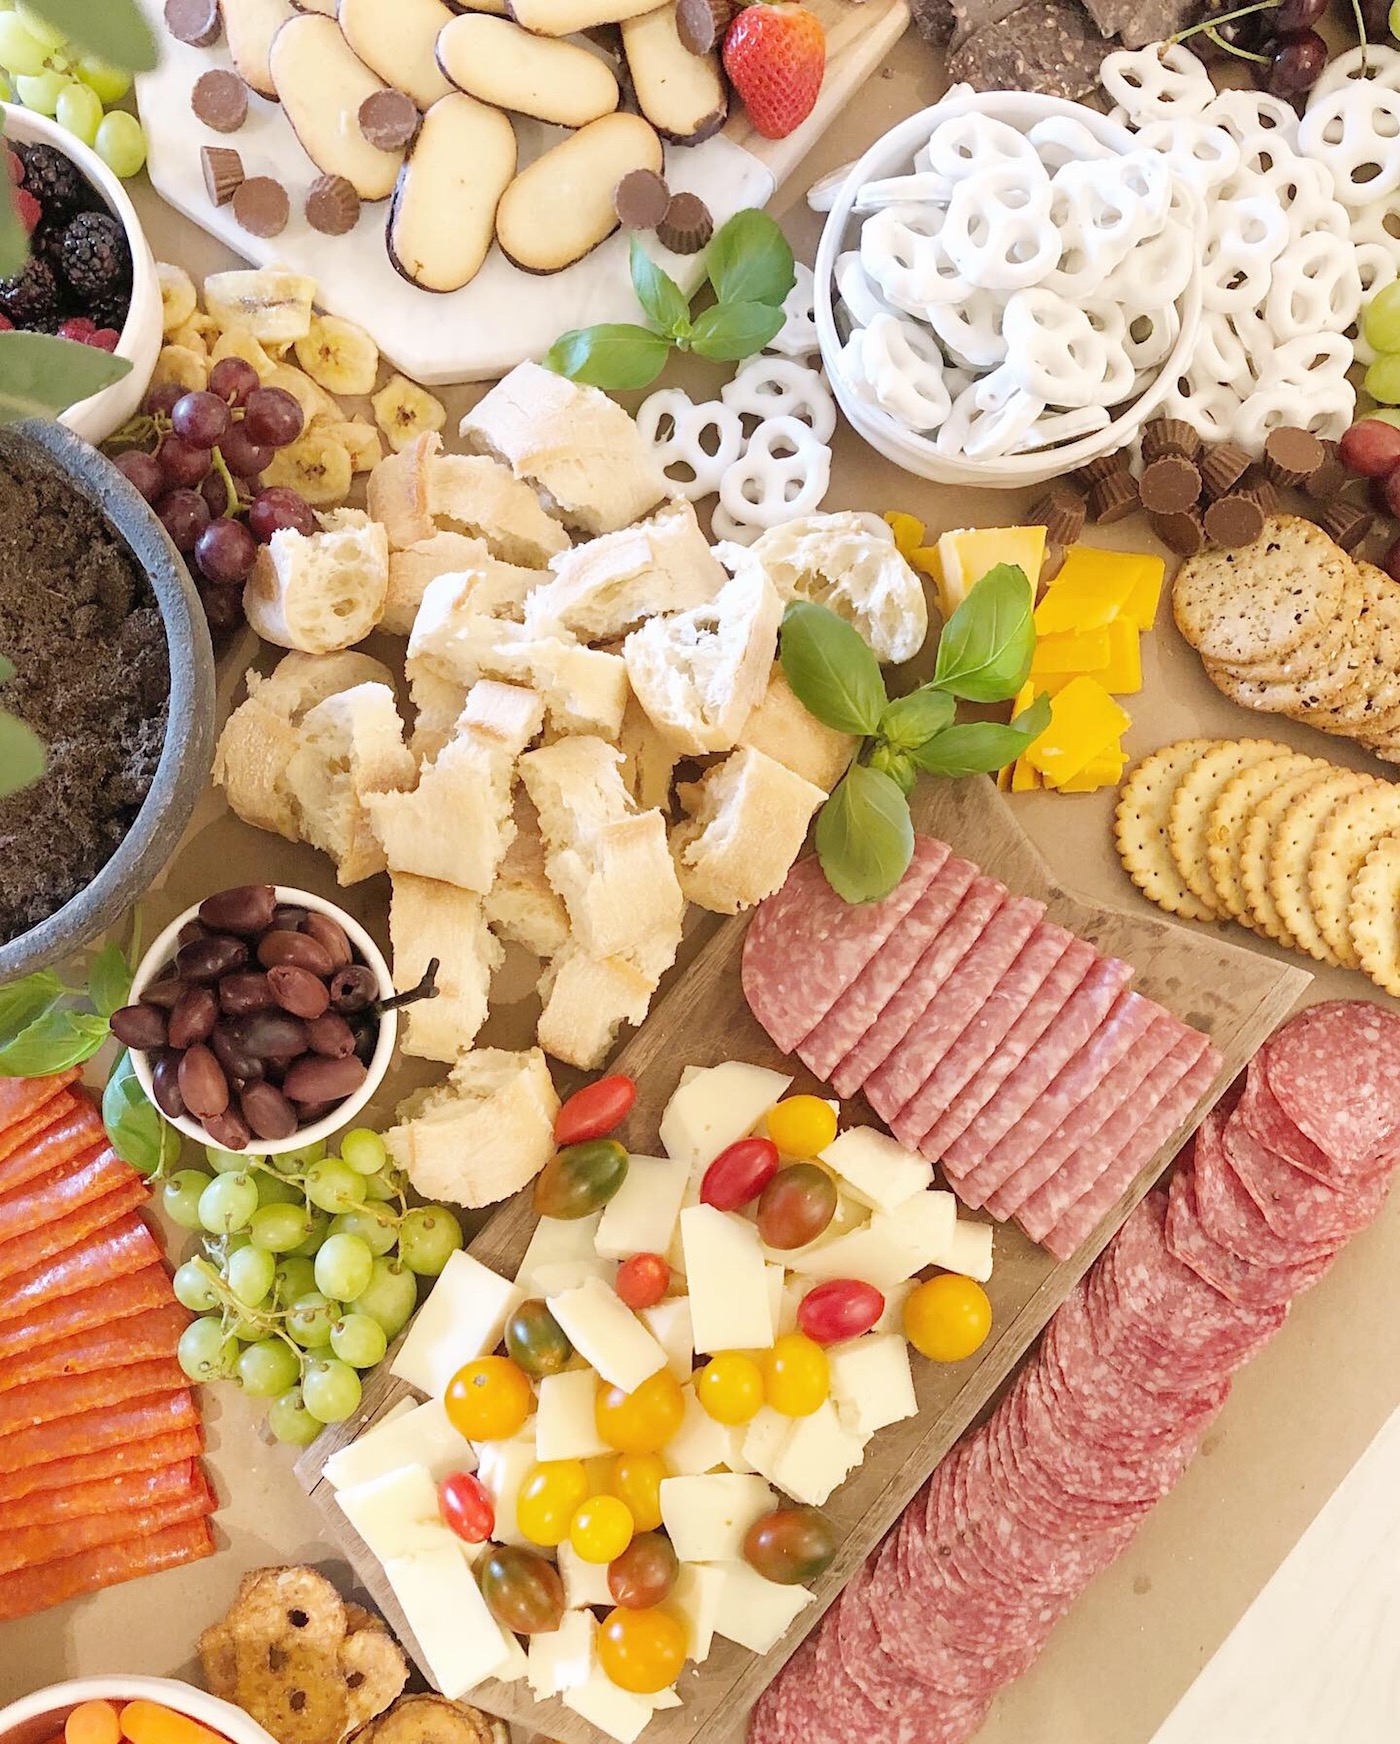
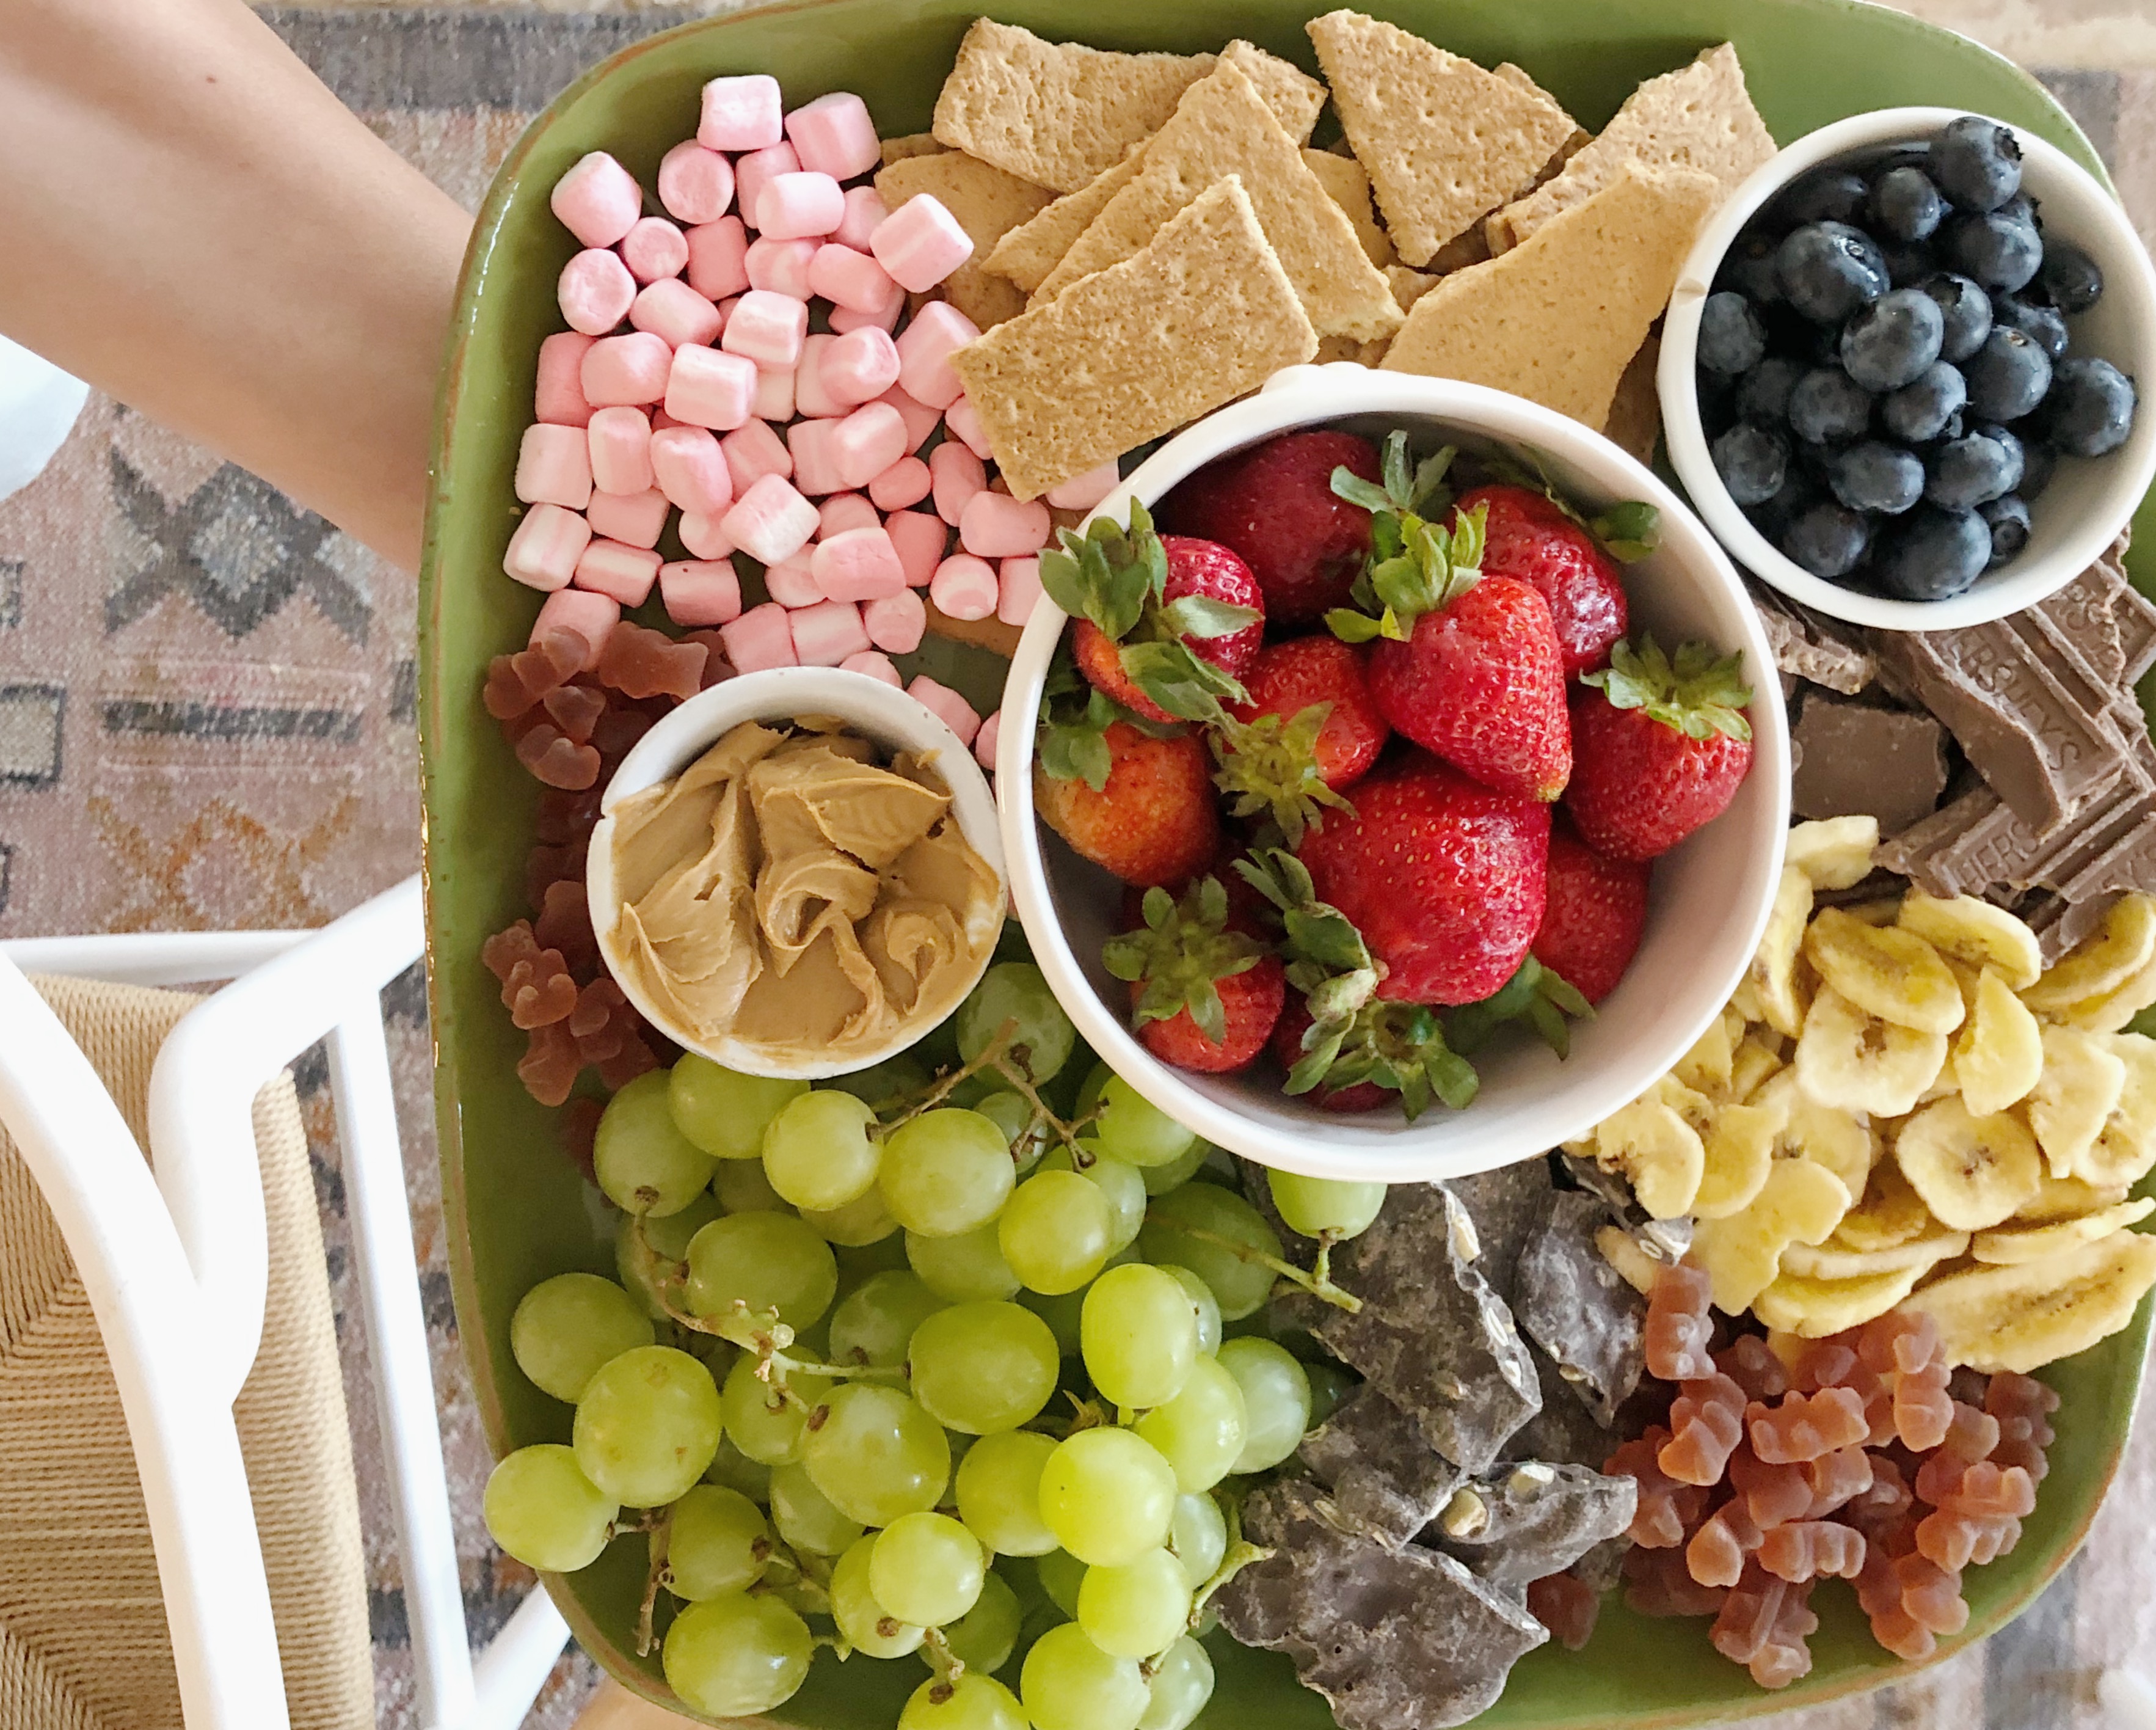
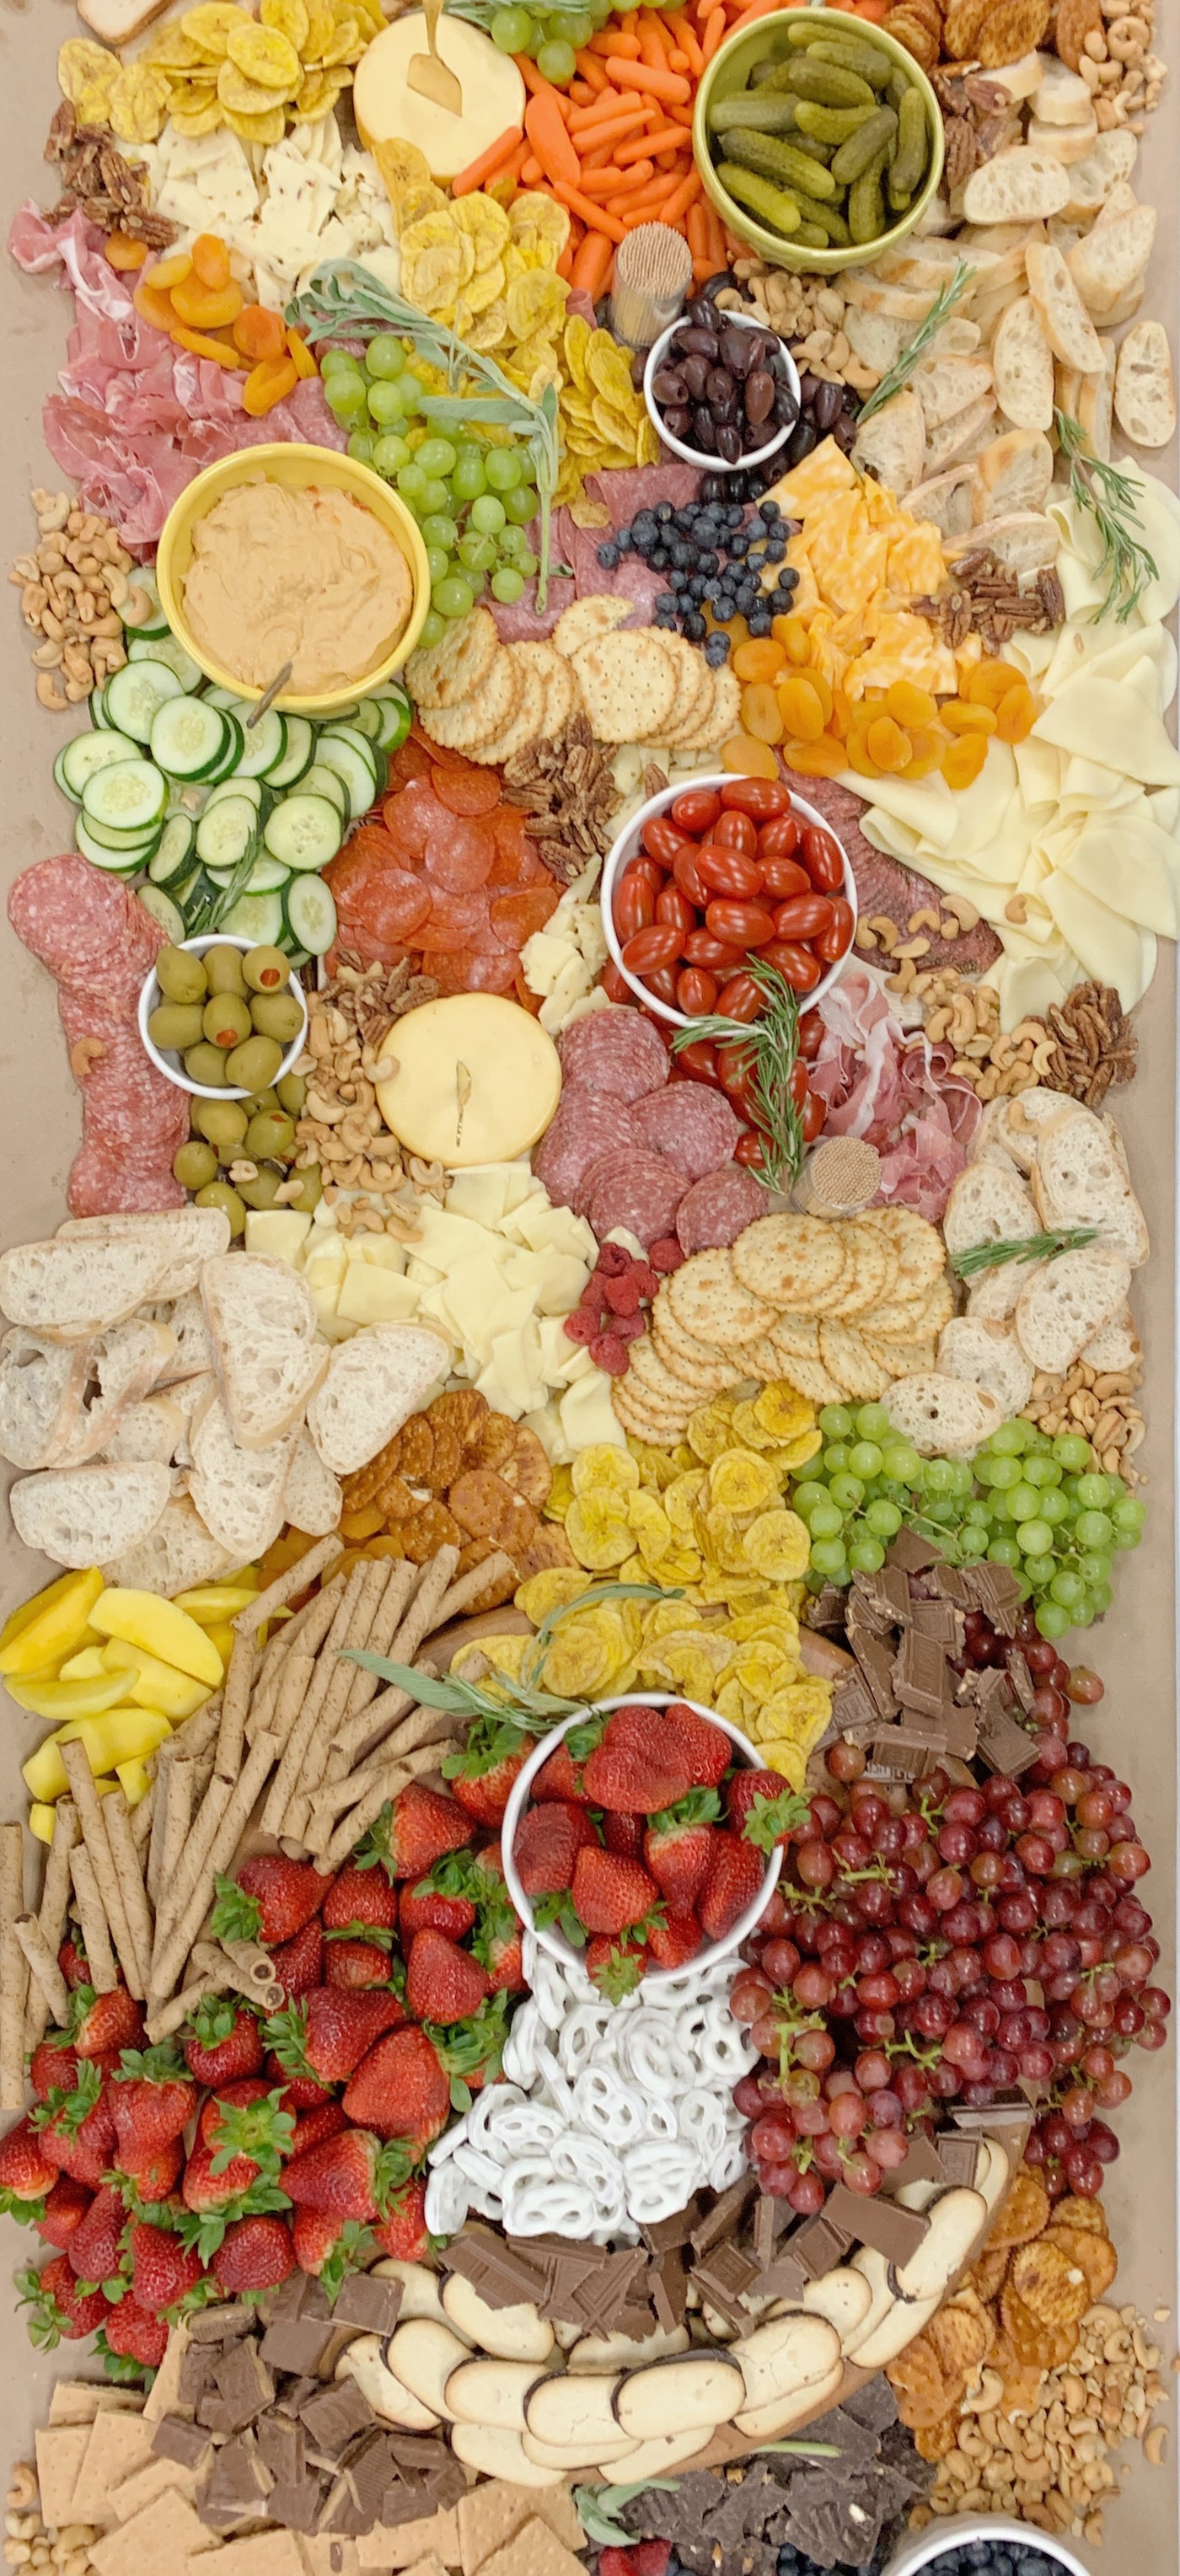
I love doing savory and sweet in the same display. You ensure that everyone grazing will find something they are in the mood for! Plus it opens up your buying options when you’re able to go in pretty much any direction while shopping for your project. I’ll include a list of my favorite items to include on trays, boards, and tables a bit further down! 🙂
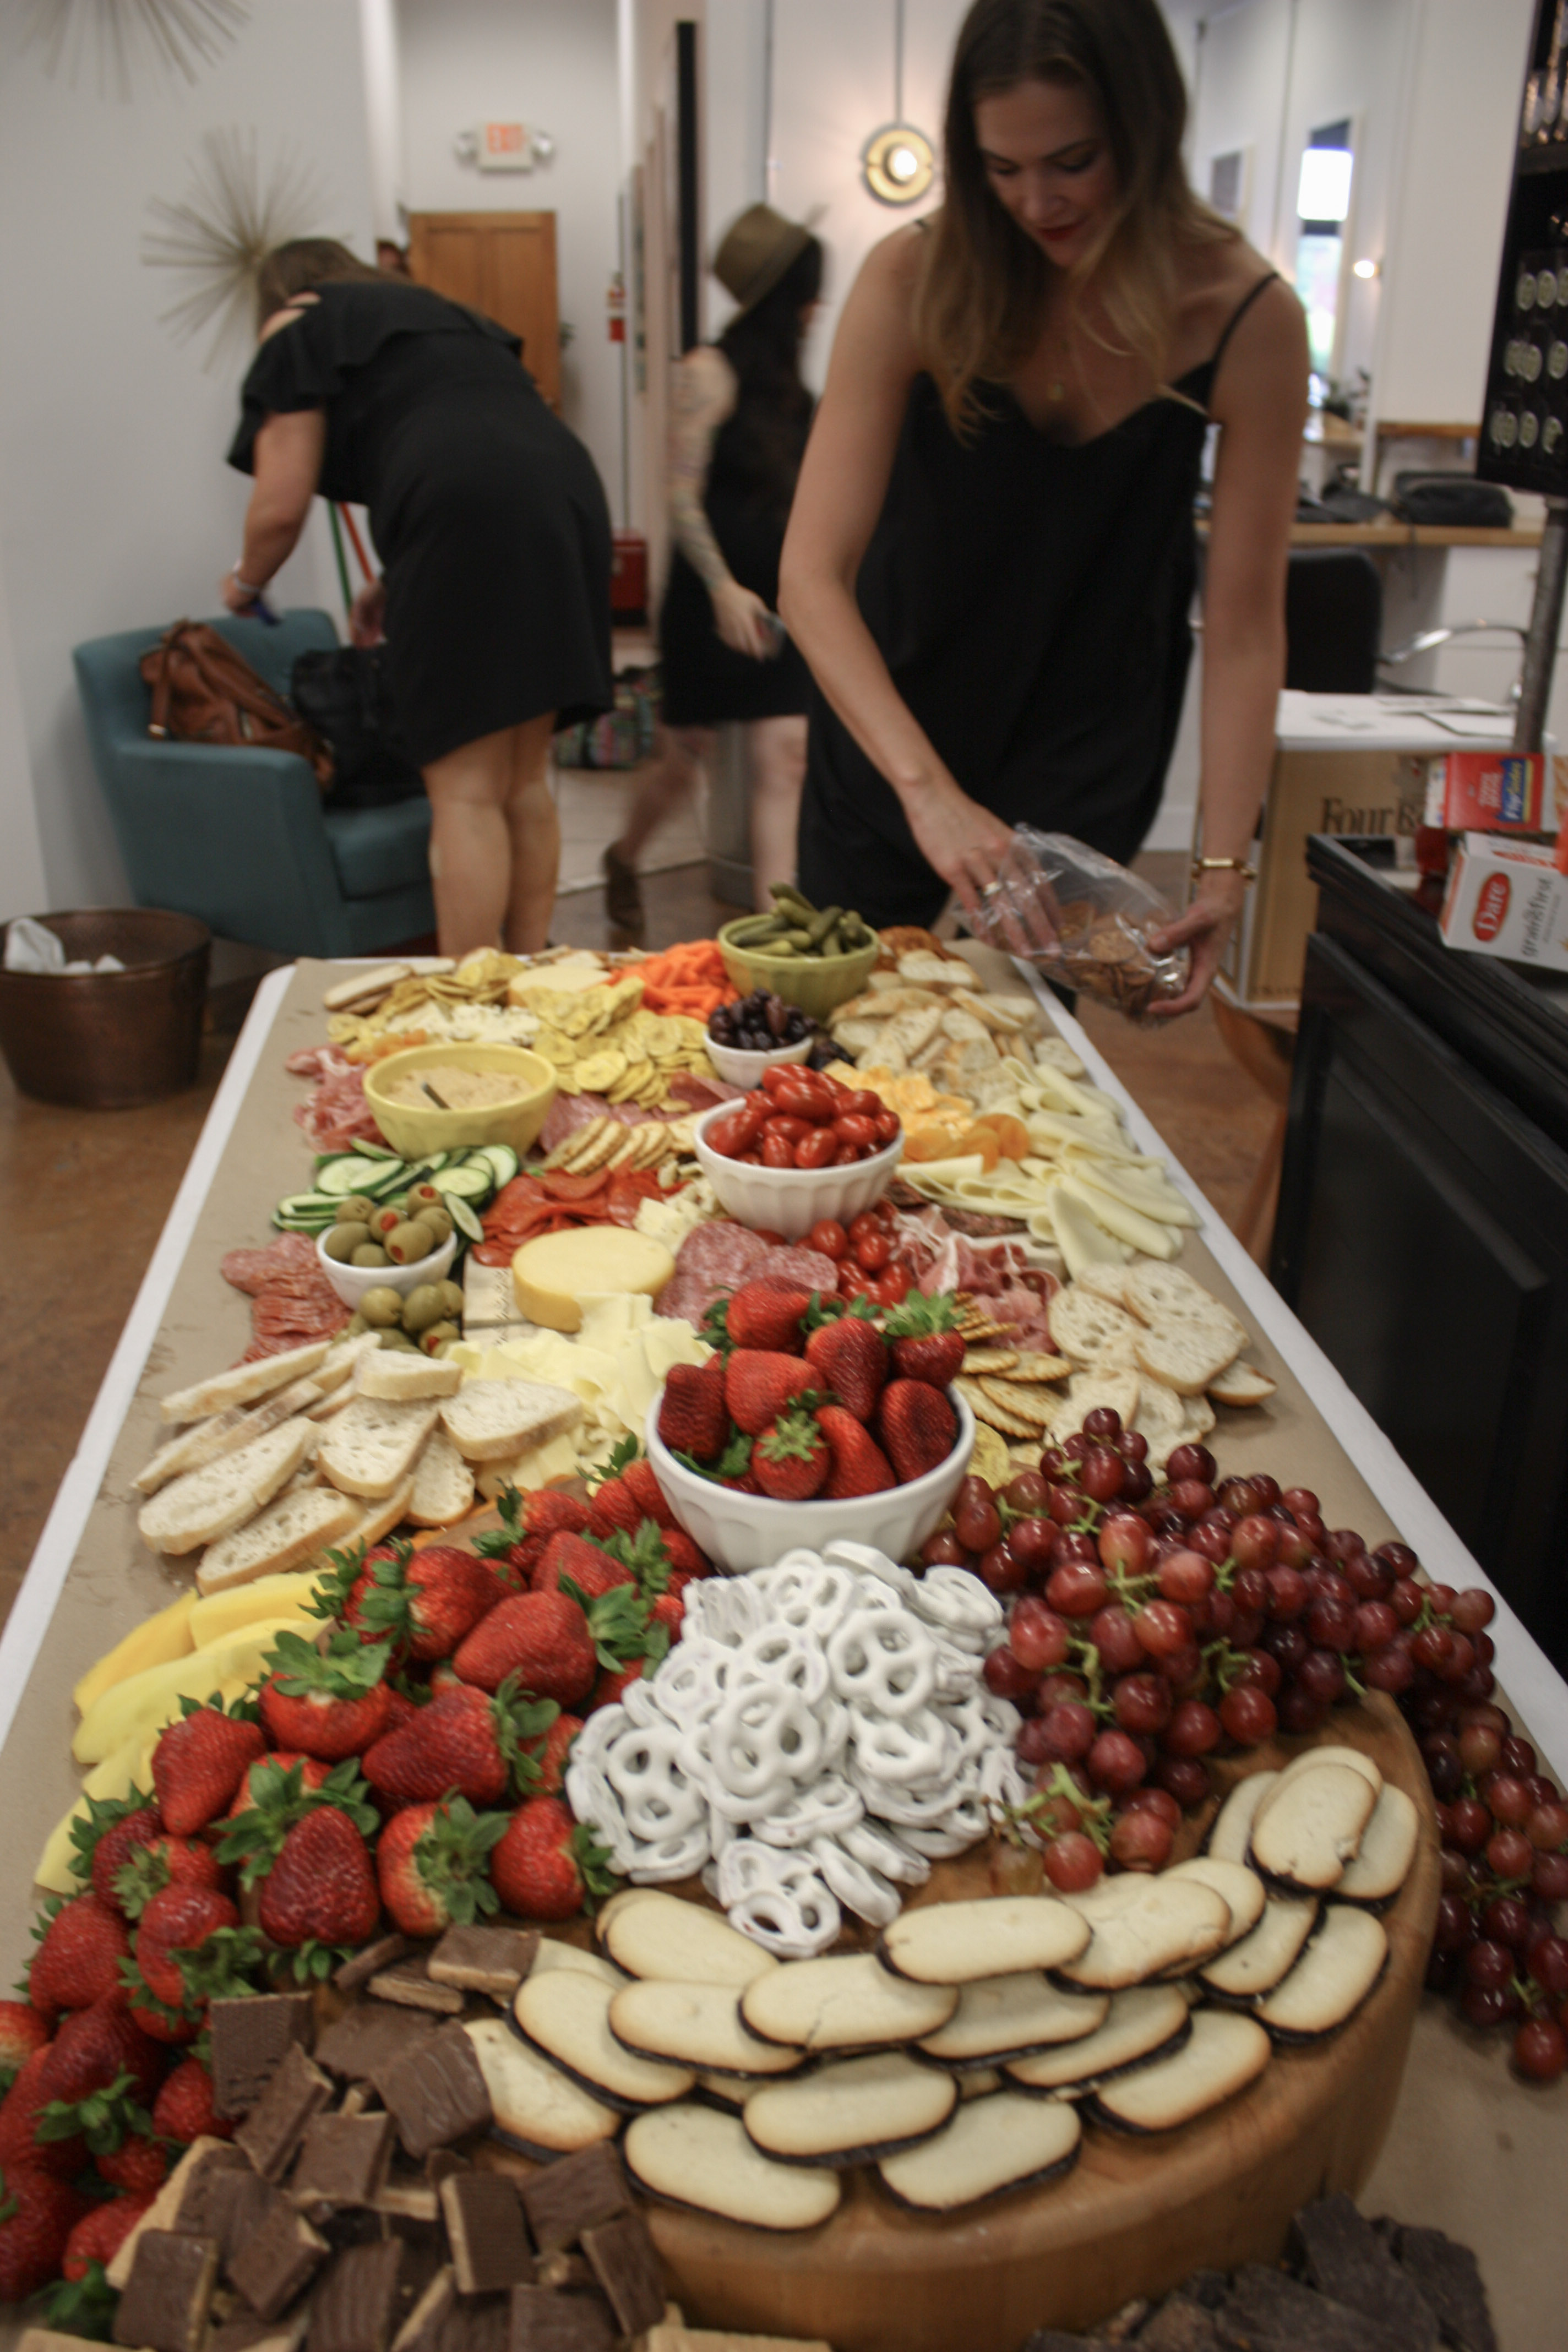
If you’ve done a charcuterie and cheese board before, you know that they can get a tad expensive. Especially when you go really heavy on the meats and fancy cheeses. I recently had the wonderful challenge of doing a six foot charcuterie/cheese/food TABLE for under $200 (for Molly Gee & Company’s rebrand launch!) Then more recently, I had the challenge of doing a four foot space for under $150 (for a SummerHouse and Bridgewater Living Magazine private event.) It IS doable if you are careful in your shopping!
Here are my tricks to staying under a tight budget for a large display:
(1) Wal Mart is your friend. They have great prices on everything, and lately our local Wal Mart has had some beautiful produce! I walk around the store with a calculator typing in the price of every single item I pick up for my table. This makes it very easy to see when I’m nearing my budget and need to slow down in order to factor in tax and stay on budget.
(2) Keep the expensive meats and cheeses to a minimum. To make your table impressive, you do need some of the expensive meats like prosciutto and sopressa. You might even grab a package or two of old world pepperoni, which is bigger and thinner and just looks prettier that the cheaper pepperoni. BUT, you can also supplement with some less expensive meats, like the bag of pepperoni intended to use on pizza, or some very thin sliced ham! With cheese, do grab a couple of nice, pretty cheeses, but also grab a block of GreatValue sharp cheddar or mozzarella. You can slice this up with a dull knife to make it look “artisan” and a little more imperfect. A pile of jagged cheese slices is a beautiful sight to behold! More on the “artisan” pile of cheese in just a minute.
(3) Buy cheap crackers and bread. Crackers and bread are necessary for these types of displays! I have found that using three or four different types of crackers or breads makes things look way more expensive than they actually were. Wal Mart has these fantastic rosemary crackers that are about $1.25 a box. GreatValue has some beautiful multi-grain round crackers that look so pretty on these tables. I would steer clear of saltines, triscuits, wheat thins, or club crackers, only because they are so predictable. When people see crackers they don’t know they name brand of, most will often assume they’re the “nice crackers!” ha! And with bread, you can buy one of those three foot long french loaves for like three bucks! Slice that baby up thin and you’ve got some really pretty bread that takes up a decent amount of room for very few dollas. If you don’t have time to slice, you can even tear it up into little bread chunks and it looks great.
(4) Grapes. They are inexpensive, take up a good bit of space on the table or board, and look beautiful!
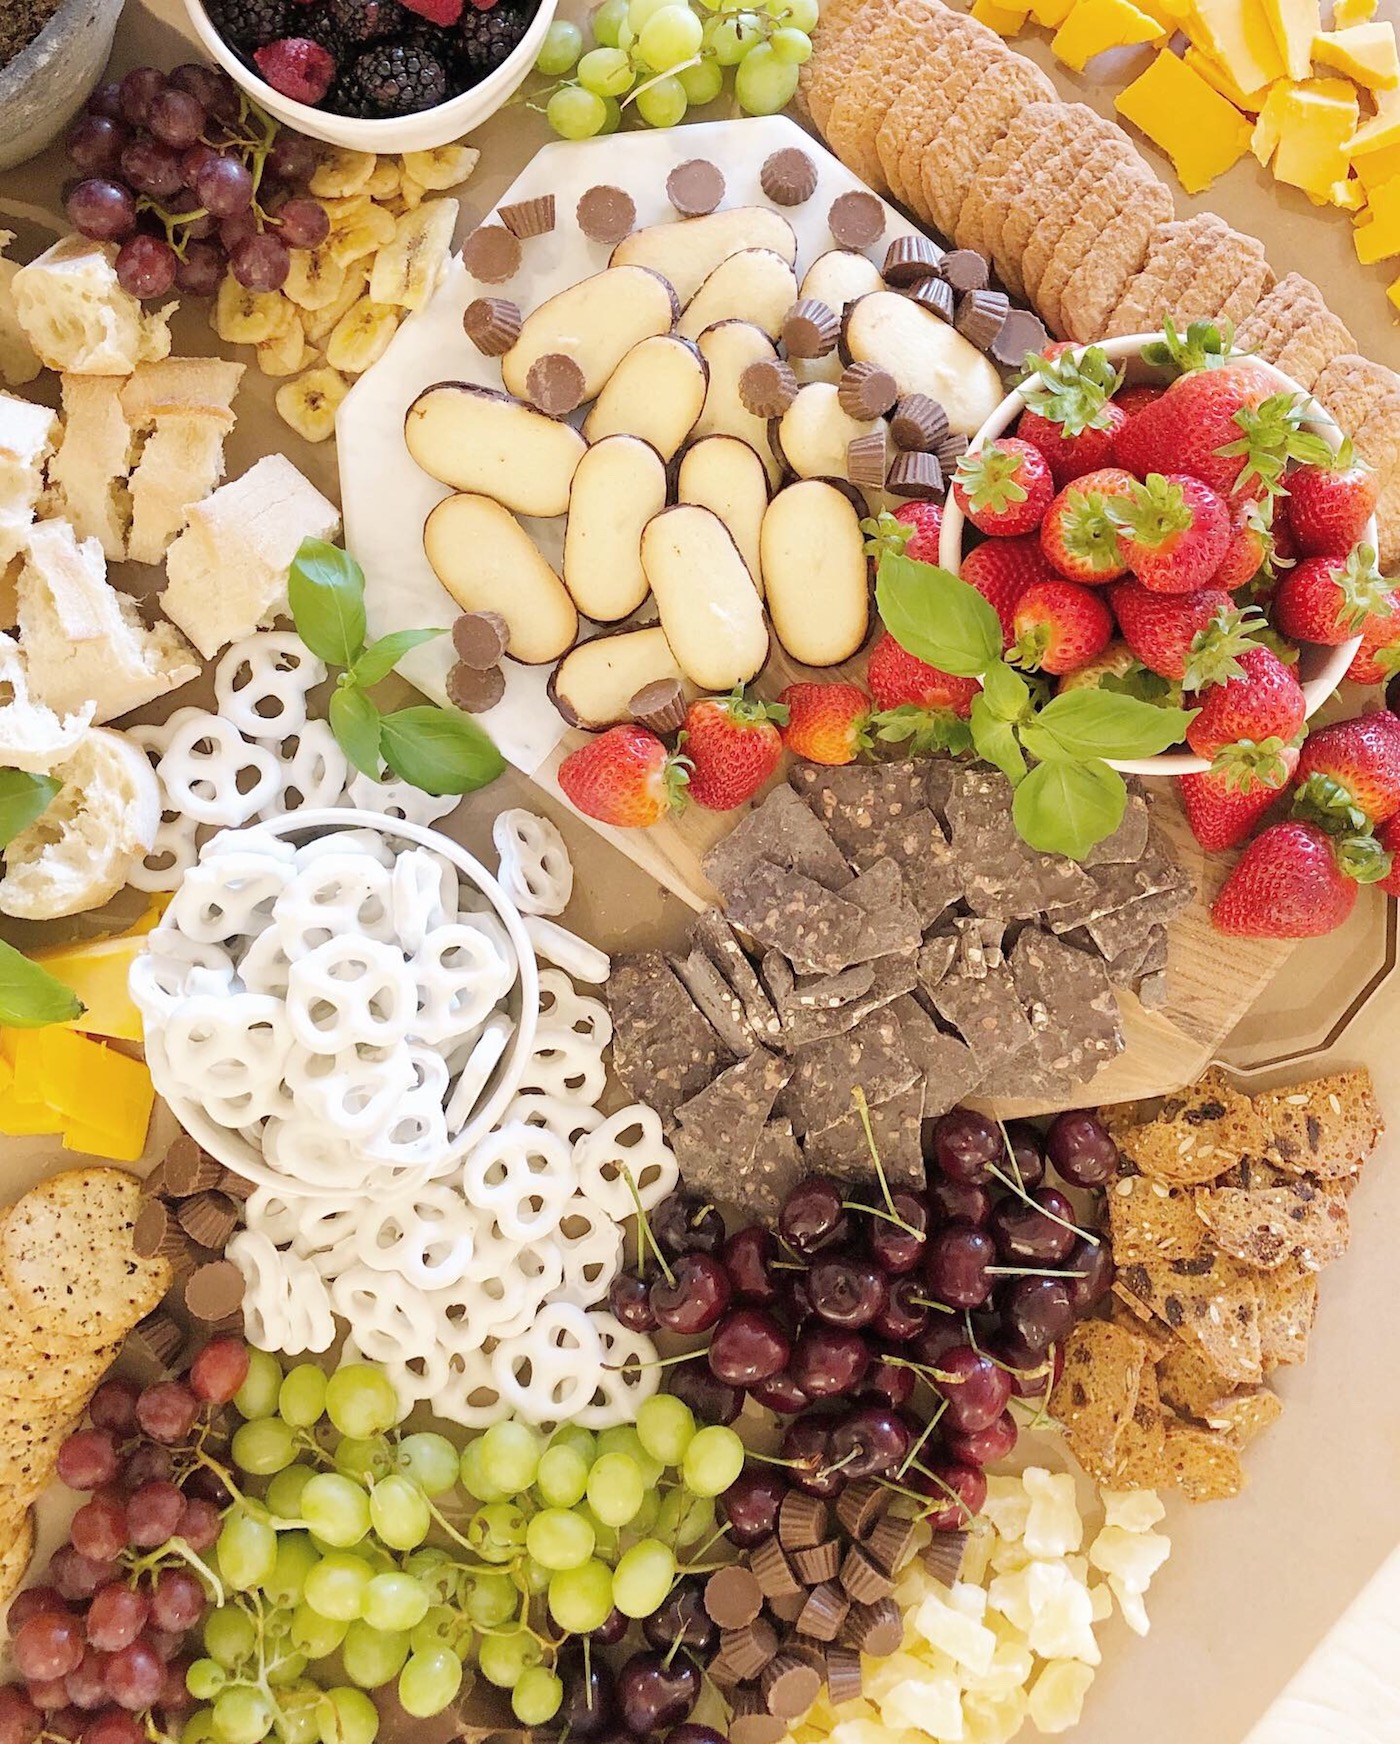
(5) Inexpensive chocolate bars! You’re probably wondering what in the heck I’m talking about here… But if you’re doing a sweet and savory table, buy a couple of those huge chocolate bars… Hershey’s, Symphony, Crunch… Then unwrap them and break them up into single bite pieces. They look “artisan,” like the oh-so-lovely yet fairly expensive Bark Thins, but they’re a fraction of the cost. For Christmas boards, those white chocolate Hershey’s bars with the peppermint would be SO PRETTY broken up!
In addition to the budget tips above, there are a few other more general tips that I’ve learned along the way!
(1) Try to incorporate as many “pick up” items as you can. I try to steer away from anything that has to be eaten with a fork or spoon. And I try to keep things that need to be cut with a knife in order to go on one’s plate, or scooped with a spoon, to a minimum. I’ve found that, when I have a pretty wedge of cheese and a pile of pre-sliced “artisan” cheese on the same board, the wedge barely gets touched while the pile of sliced cheese disappears quickly. People are afraid of making a fool of themselves slicing hard cheese in front of a crowd (BEEN THERE!), and also, it sometimes requires two hands. If I have to set my wine down in order to hold the wedge with one hand while slicing with the other, I just ain’t gon bother with that cheese. Ya feel me? Soft cheeses, however, are much easier to include as a “slice-in-the-moment” cheese.
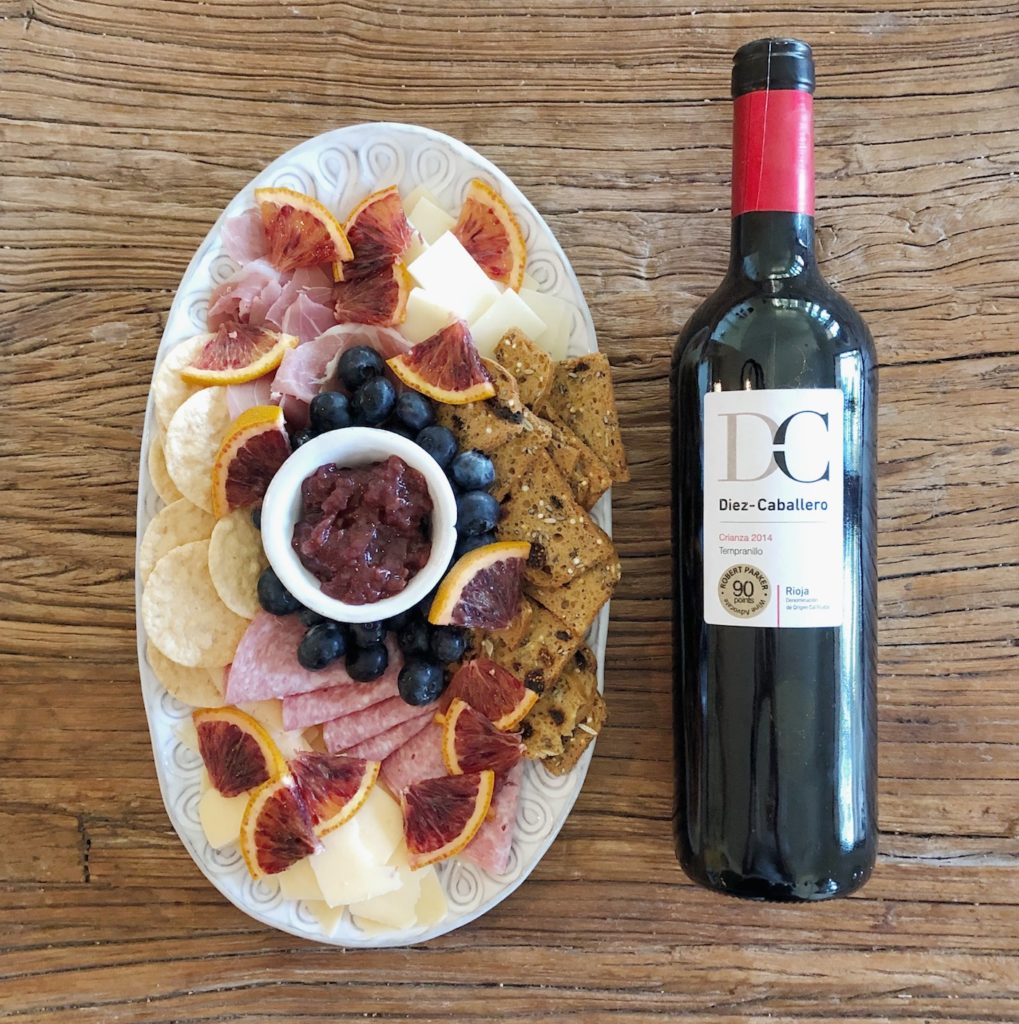
(2) In contrast, I have found that including a jam on a charcuterie table is the magical sparkle that makes the whole table better! I particularly love fig or raspberry preserves or jams. That little bit of sweet just makes the cheese, meat, and crackers taste so much better. And it looks pretty! And it’s easy to dollop just a little bit of jam onto your plate and scoop it up with a cracker to add that sweet magic to your bite!
(3) If you include berries, olives, nuts, or pickles, I recommend keeping those contained in bowls. You don’t want their juices soaking into other foods, plus most of those things have the tendency to roll and not stay where you want them to stay!
(4) On the tables or boards where I include sweet and savory, I like to kind of progress from sweet at one end to savory at the other. There are some foods that are obviously very sweet (like candy) and other foods that are clearly very savory (like olives and pickles.) Other things, like fruit and veggies, in my opinion, can kind of serve as the buffer between the salty end and the sweet end. I just think it would be a bad idea to have chocolate covered espresso beans and olives in bowls right next to each other. That could get a little confusing for the consumer, especially in a party setting where people graze socially while talking to someone, only halfway paying attention to what they’re picking up.
(5) When arranging on tables, I usually roll out a big sheet of kraft butcher paper (bought this roll years ago and still using it. GREAT value!) and arrange directly onto that, rather than trying to round up enough plates and trays to cover such a large area. This gives you so much more freedom!
With this progression in mind, here is a great list of items to consider including on your next board, tray, or table sorted by category!
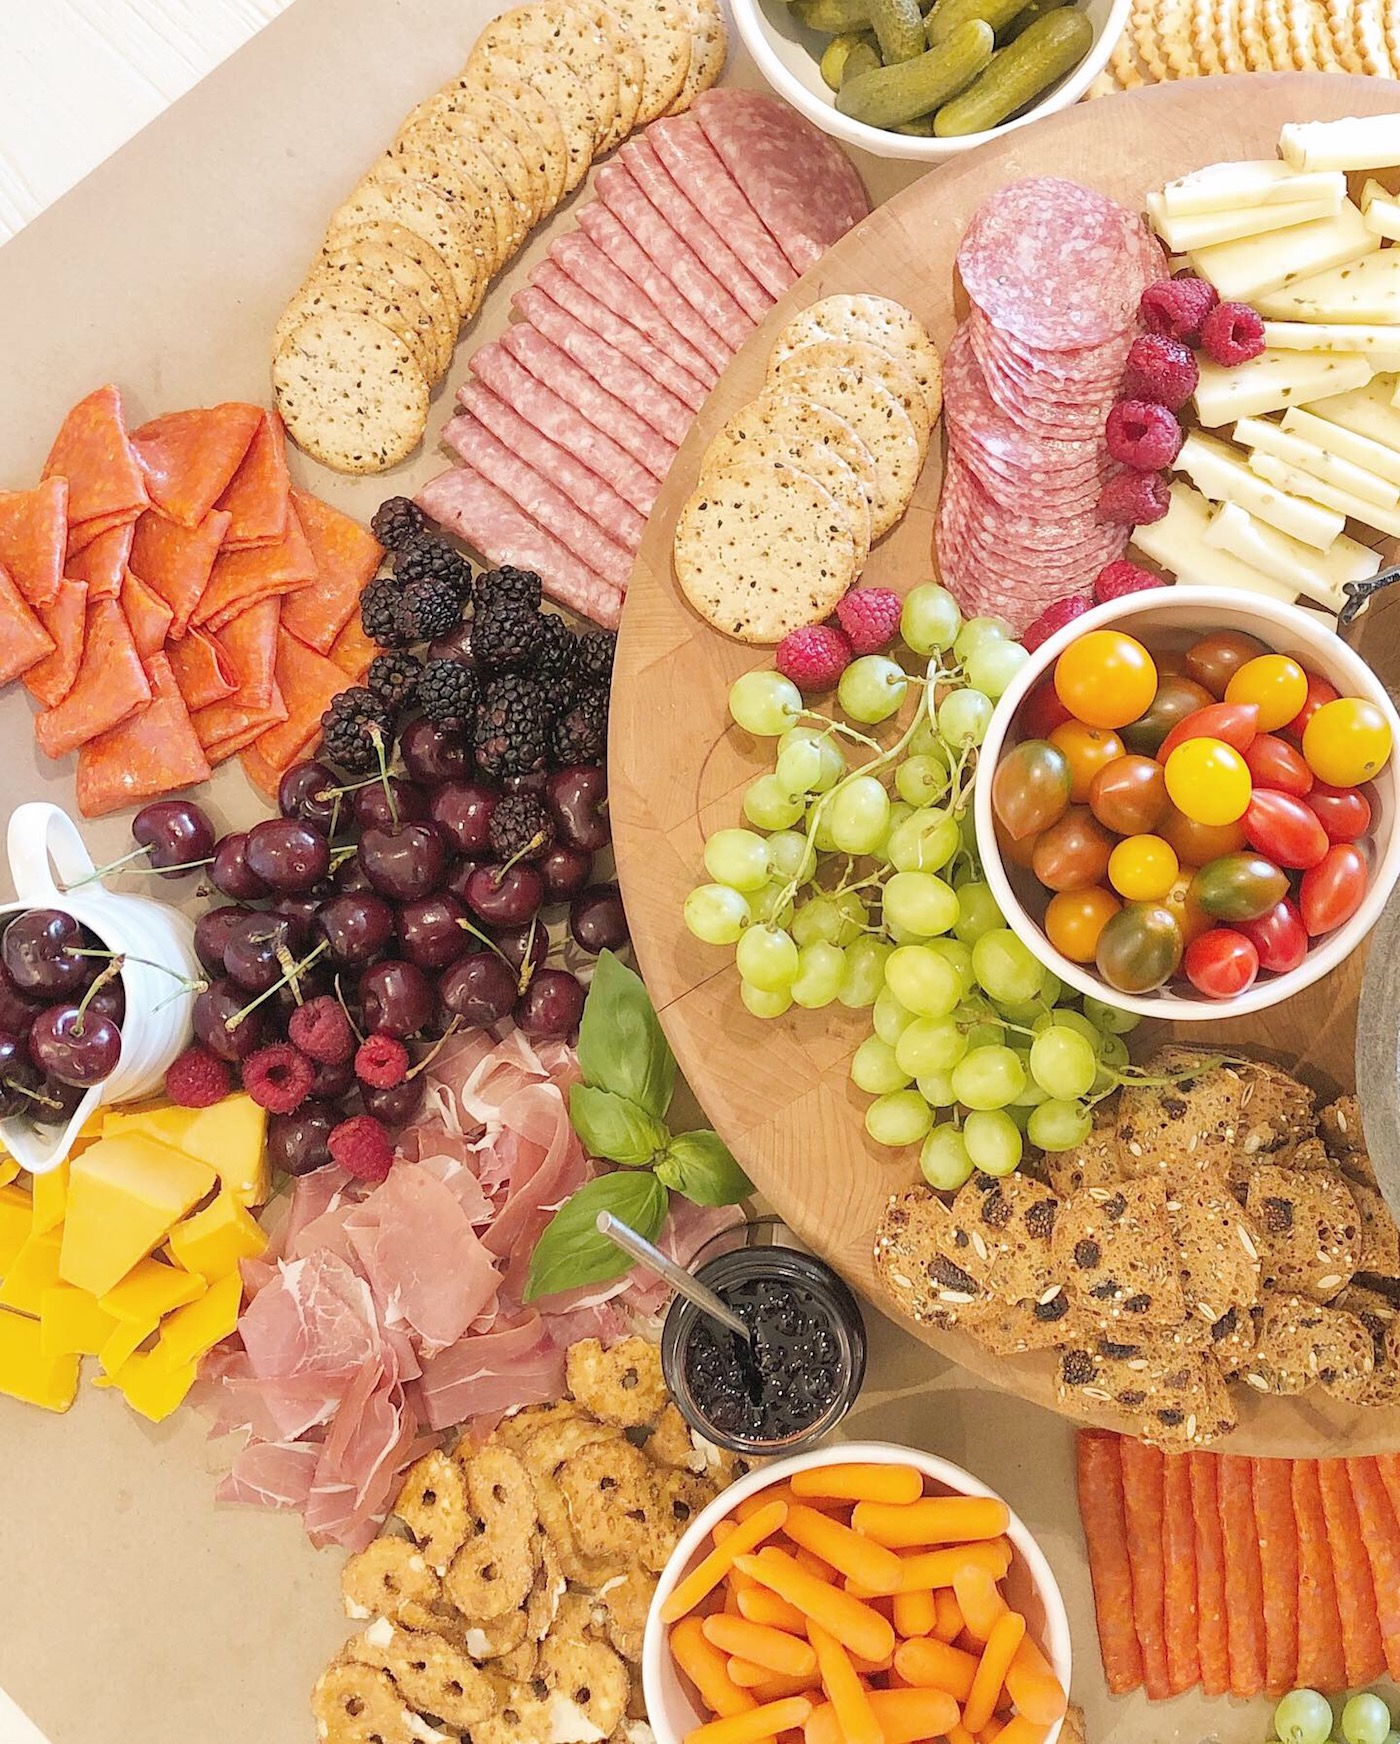
SAVORY ITEMS:
- Any and all hard cheeses
- One or two soft cheeses
- olives, black or green
- small whole pickles
- proscuitto
- salami
- pepperoni
- sopressa
- thinly sliced ham
TRANSITIONAL ITEMS
- berries
- cherries
- dried fruits
- banana chips
- plantain chips
- peanut butter
- dried mango
- dried pineapple
- sliced cucumber
- baby carrots
- small peppers
- cherry tomatoes
- blanched asparagus
- nuts
- crackers
- french bread, either sliced or broken up
- hummus
- raspberry or fig jam/preserves
- pretzel chips
- pretzels
- nut crackers
SWEET ITEMS:
- large candy bars, broken up
- Bark Thins
- Small Reese’s cups
- chocolate or yogurt covered pretzels
- banana chips
- Pirouette/Pirouline wafers
- graham crackers, broken up
- Milano cookies by Pepperidge Farm
- pretty cookies (I love almost all the Pepperidge Farm cookies)
- marshmallows
- chocolate covered espresso beans
- gummy bears
- nutella
GARNISHES:
- sliced citrus
- herbs
- chocolate chips
- nuts
And here are some great necessities for your board or table! Kraft paper to roll out and build upon, boards, cheese knives and cheese labels!


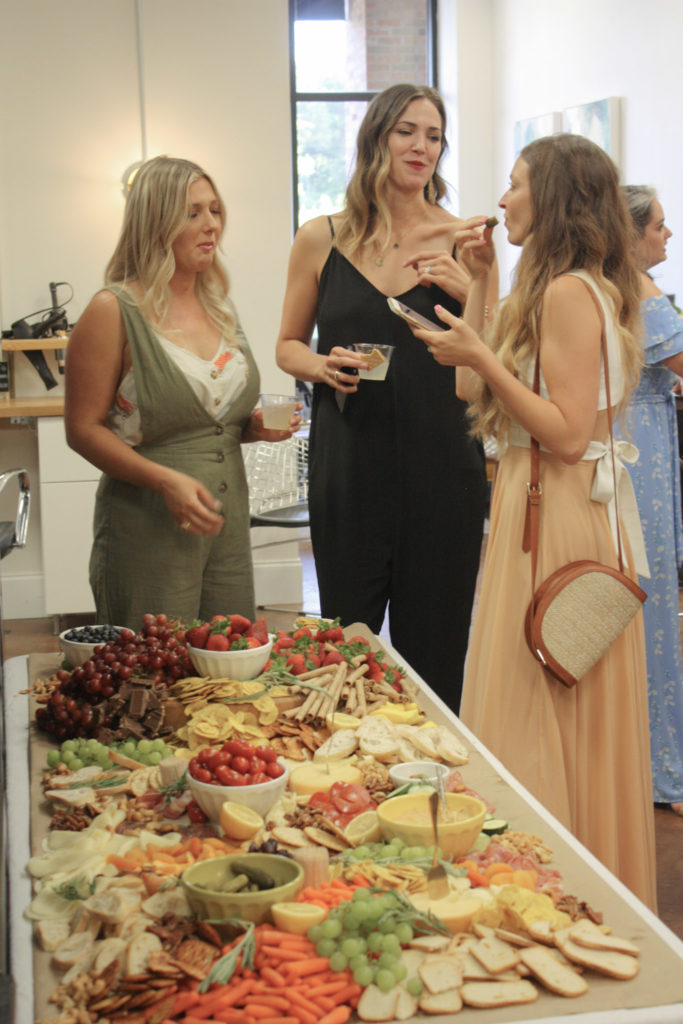
^^ That’s just me and some of my girlfrands doing what charcuterie boards help foster: eating while catching up on life and having a creative brainstorming meeting at a party! 😉 (Thanks Mary Leslie for this photo and the one earlier of me setting up this table!)
This really is such a fun way to serve food for parties and showers! And on a smaller scale, this is perfect to bring to any girls’ night, poker night, family dinner… Really, fun food boards are appropriate for any and every occasion because they are so customizable!
I guess now would be a great time to say that, since I’ve done a couple for parties and friends’ events, I now have a little service I offer doing this for people! I wanted to name this service, so I went with MerryGold Food Trays. These boards make me happy (merry) and I just generally love all shades of yellow (gold) so… MerryGold!
If you’d like to hire me to do one of these for a party, or if you want me to teach a class for you and your girlfriends about how I buy for and arrange these things, hit me up! We’ll see what we can work out 🙂
I hope this was helpful for any of you looking to explore the art of food trays! It’s really so much fun. The options are endless! If you have any specific questions, drop them in the comments and I’ll do my best to answer!
Thanks a MILLION for dropping in today. I hope you have the best weekend! I know we plan to!


So pretty and helpful!
That means a lot coming from a charcuterie super-fan such as yourself! So glad you enjoyed! 🙂
Oh my God, it looks so tasty and really pretty. Thank you for posting your experience. I think I would like to try it.
Yes please try it out! I hope my tips are helpful! Thank you so much for reading 🙂
Yummers! Delicious AND beautiful presentation!
Thanks so much, Flavey bear!! It sure is fun to do! 🙂
How do you keep the cheese and meats cold?? This is such a wonderful idea. Just want to keep things cold??
I simply keep them refrigerated until RIGHT before I set up the table. The beauty of some charcuterie meats is that they are usually prepared with enough salt/smoking that they can stand to be room temp for a longer period of time. Some are even sold not refrigerated! This website is helpful in navigating this obstacle from a meat perspective! https://eatcuredmeat.com/charcuteriecured-meat-does-it-need-to-be-kept-refrigerated/
Cheeses can be tricky, too! Depends on if they’re soft or hard! I usually just try to replace holes where cheese was with fresh, refrigerated cheese! Here is a helpful article from the cheese perspective! https://www.usdairy.com/news-articles/how-long-can-cheese-sit-out
Thanks for the info. I love the idea of this, but because there is such a variety of stuff, it can be a little overwhelming. Your blog was super helpful!
Oh I am SO glad to hear this was helpful for you!!! Thanks for reading! 🙂 XO!
Brilliant, this has been a massive help… what is the brown sheet you place under the food please?
I’m so happy this has been helpful!!! Here is a link to the brown paper I purchase for these boards! https://rstyle.me/+D0tXszxBuRH-RZfzZY3xMw
Super helpful! Great job!
I’m so glad you found it helpful!! Thanks so much for visiting my site! 🙂
Nice! Very helpful and Thank you!